
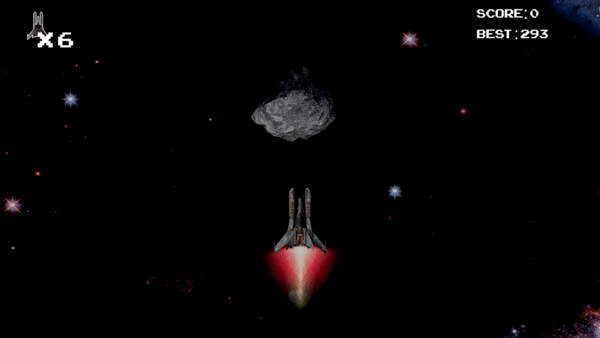
Player movement - When the player moves too far to the left/right side of the screen they will appear on the opposite side.
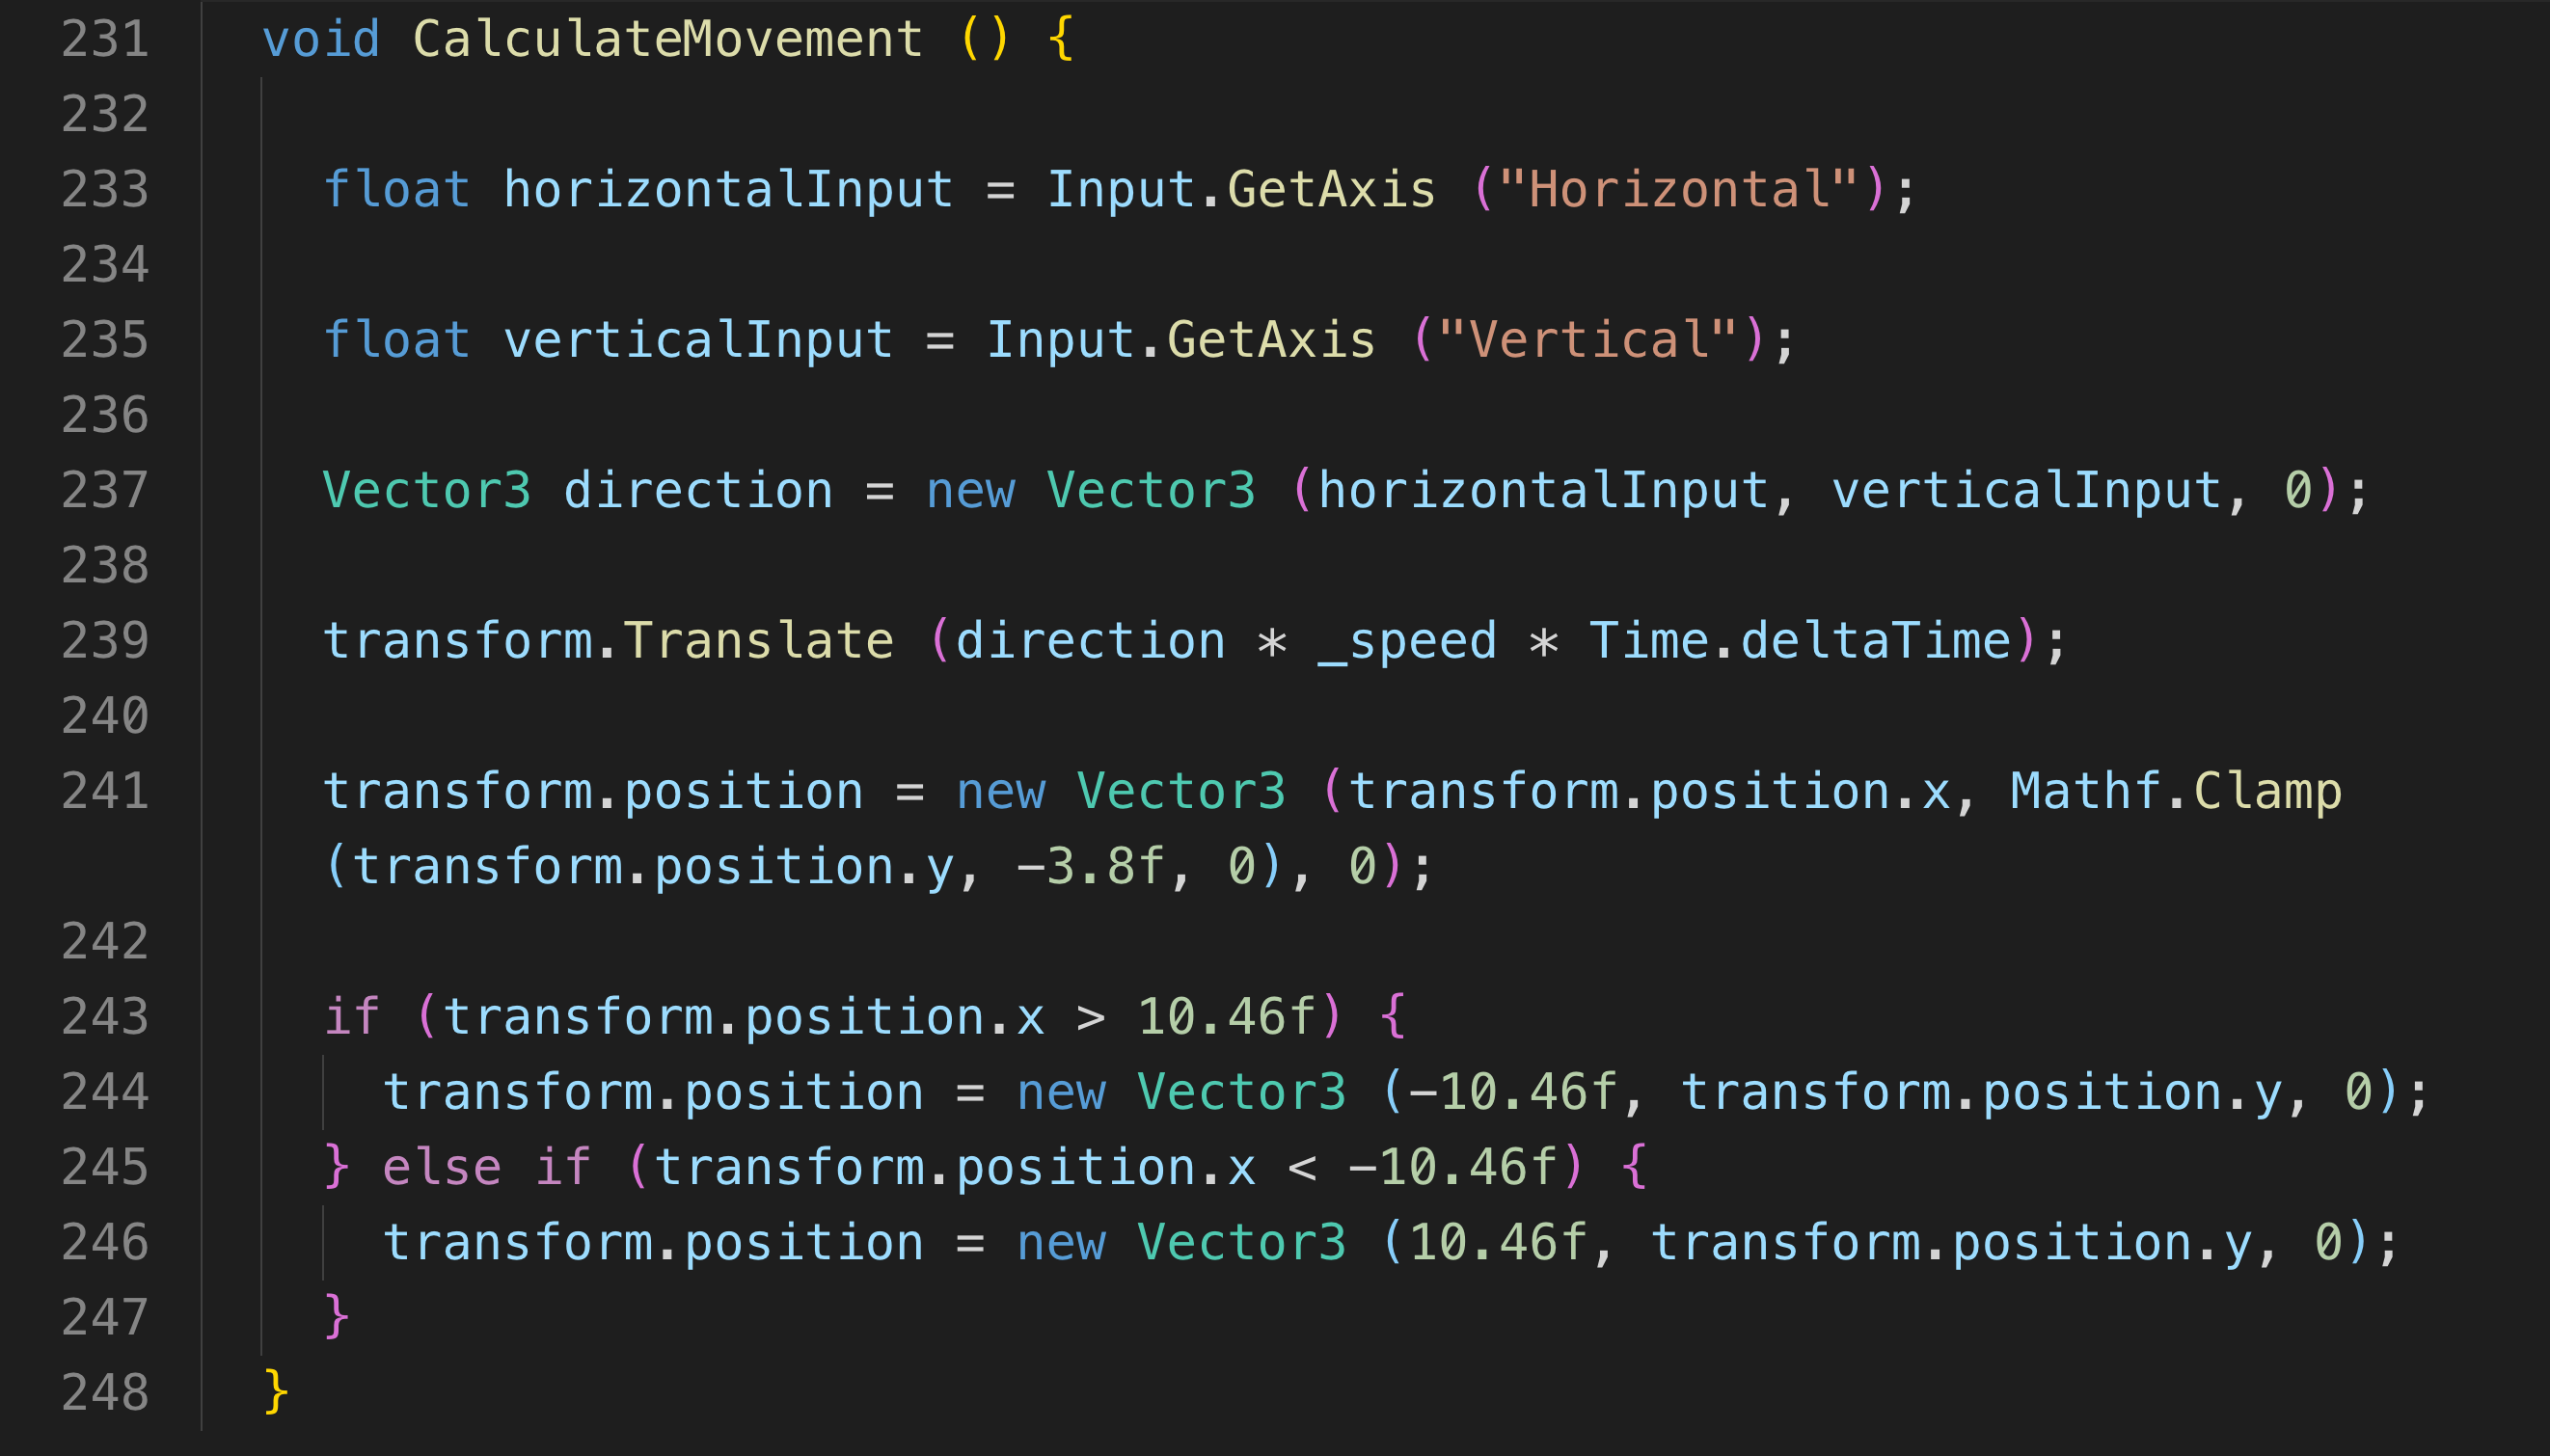
In my player script, the CalculateMovement() method tells the
player how to move and sets the boundary that causes the player
to switch to the opposite side.
On line 233, I assign a variable Unity's horizontal axis from
it's Input Manager. This Input Manager assigns keys of my
choosing to it so I can use them to move along the horizontal
axis (left/right). I chose to use the left and right arrow keys.
The same thing happens on line 235 but with the vertical axis
and the up & down arrrow keys instead (to move up/down). I use
the horizontal and vertical variables
On line 237, the direction variable controls our direction of
travel. It uses the horizontal variable as the x value and the
vertical variable as the y value in this Vector3(x,y,z) to allow
us to move the player both horizontally and vertically using the
arrow keys. We don't need the z axis in this 2D game so we pass
in 0.
"_speed" is a global variable that controls how fast the player
moves and when we combine it with the Vector3 that controls the
player's horizontal and vertical axes, it will apply that speed
when you press the arrow keys. We also multiply this by
Time.deltaTime so the player moves in real time and not game run
time (which would be so fast you probably wouldn't see it move).
On line 241, I use Mathf.Clamp() to restrict the y position of
the player to -3.8f and 0. Which stops the player from moving
below the bottom of the screen & above the middle of the screen.
On lines 243-247, I make the player warp to the opposite side of
the screen (horizontally). I use an if-else if statement to
check if the player is at the far left or right(which I
determined to be -10.46 & +10.46 respectively). If they are then
I just reassign the position.
Player laser - The player can shoot 1 laser at a time, unless they collect a Triple Shot power up, in which case they can shoot 3 at once.

The player script's FireLaser() allows the player to shoot a laser. The _canFire float holds how much time you must wait before another laser can be shot. It is calculated by taking the current time the game has been running and adding my _fireRate float (set to 0.15 seconds) When a Triple Shot power up is collected, the _isTripleShotActive bool is changed to true, which then instantiates my triple shot prefab of 3 lasers when we go to fire a laser.
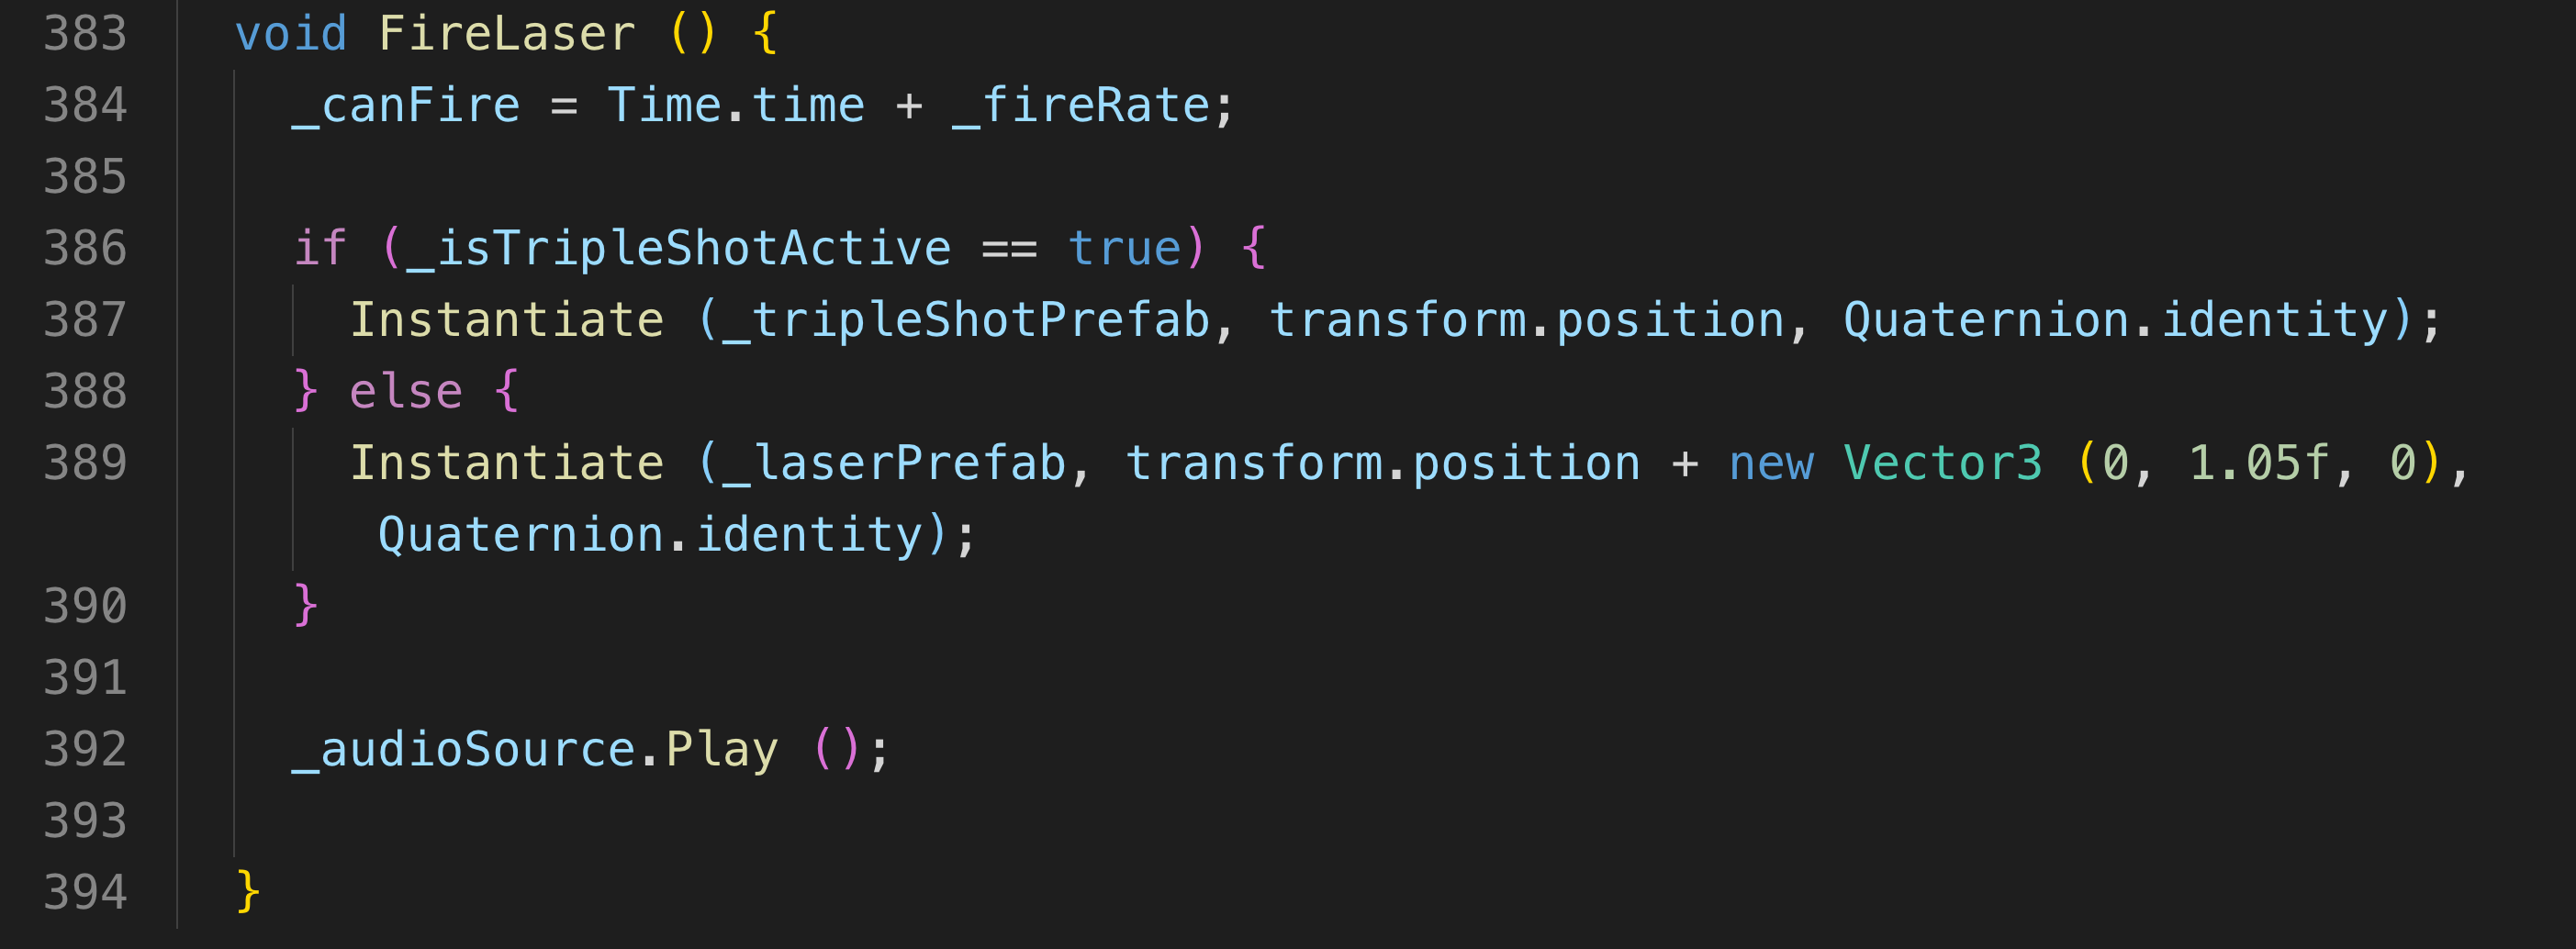
In this if statement we see we can only fire a laser if Time.time is greater than _canFire. So if The game was running for 2.00 seconds and _canFire was calculated to be 2.15 (2.00 game time + 0.15 from _fireRate) we can't fire a laser until the game has been running for at least 2.16 seconds.

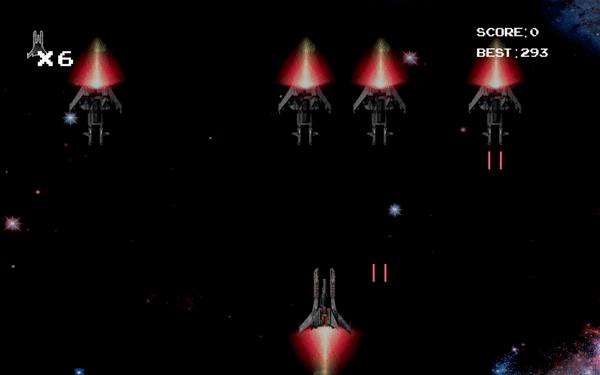
Enemy Spawn & Attack - Enemies will spawn & attack routinely.
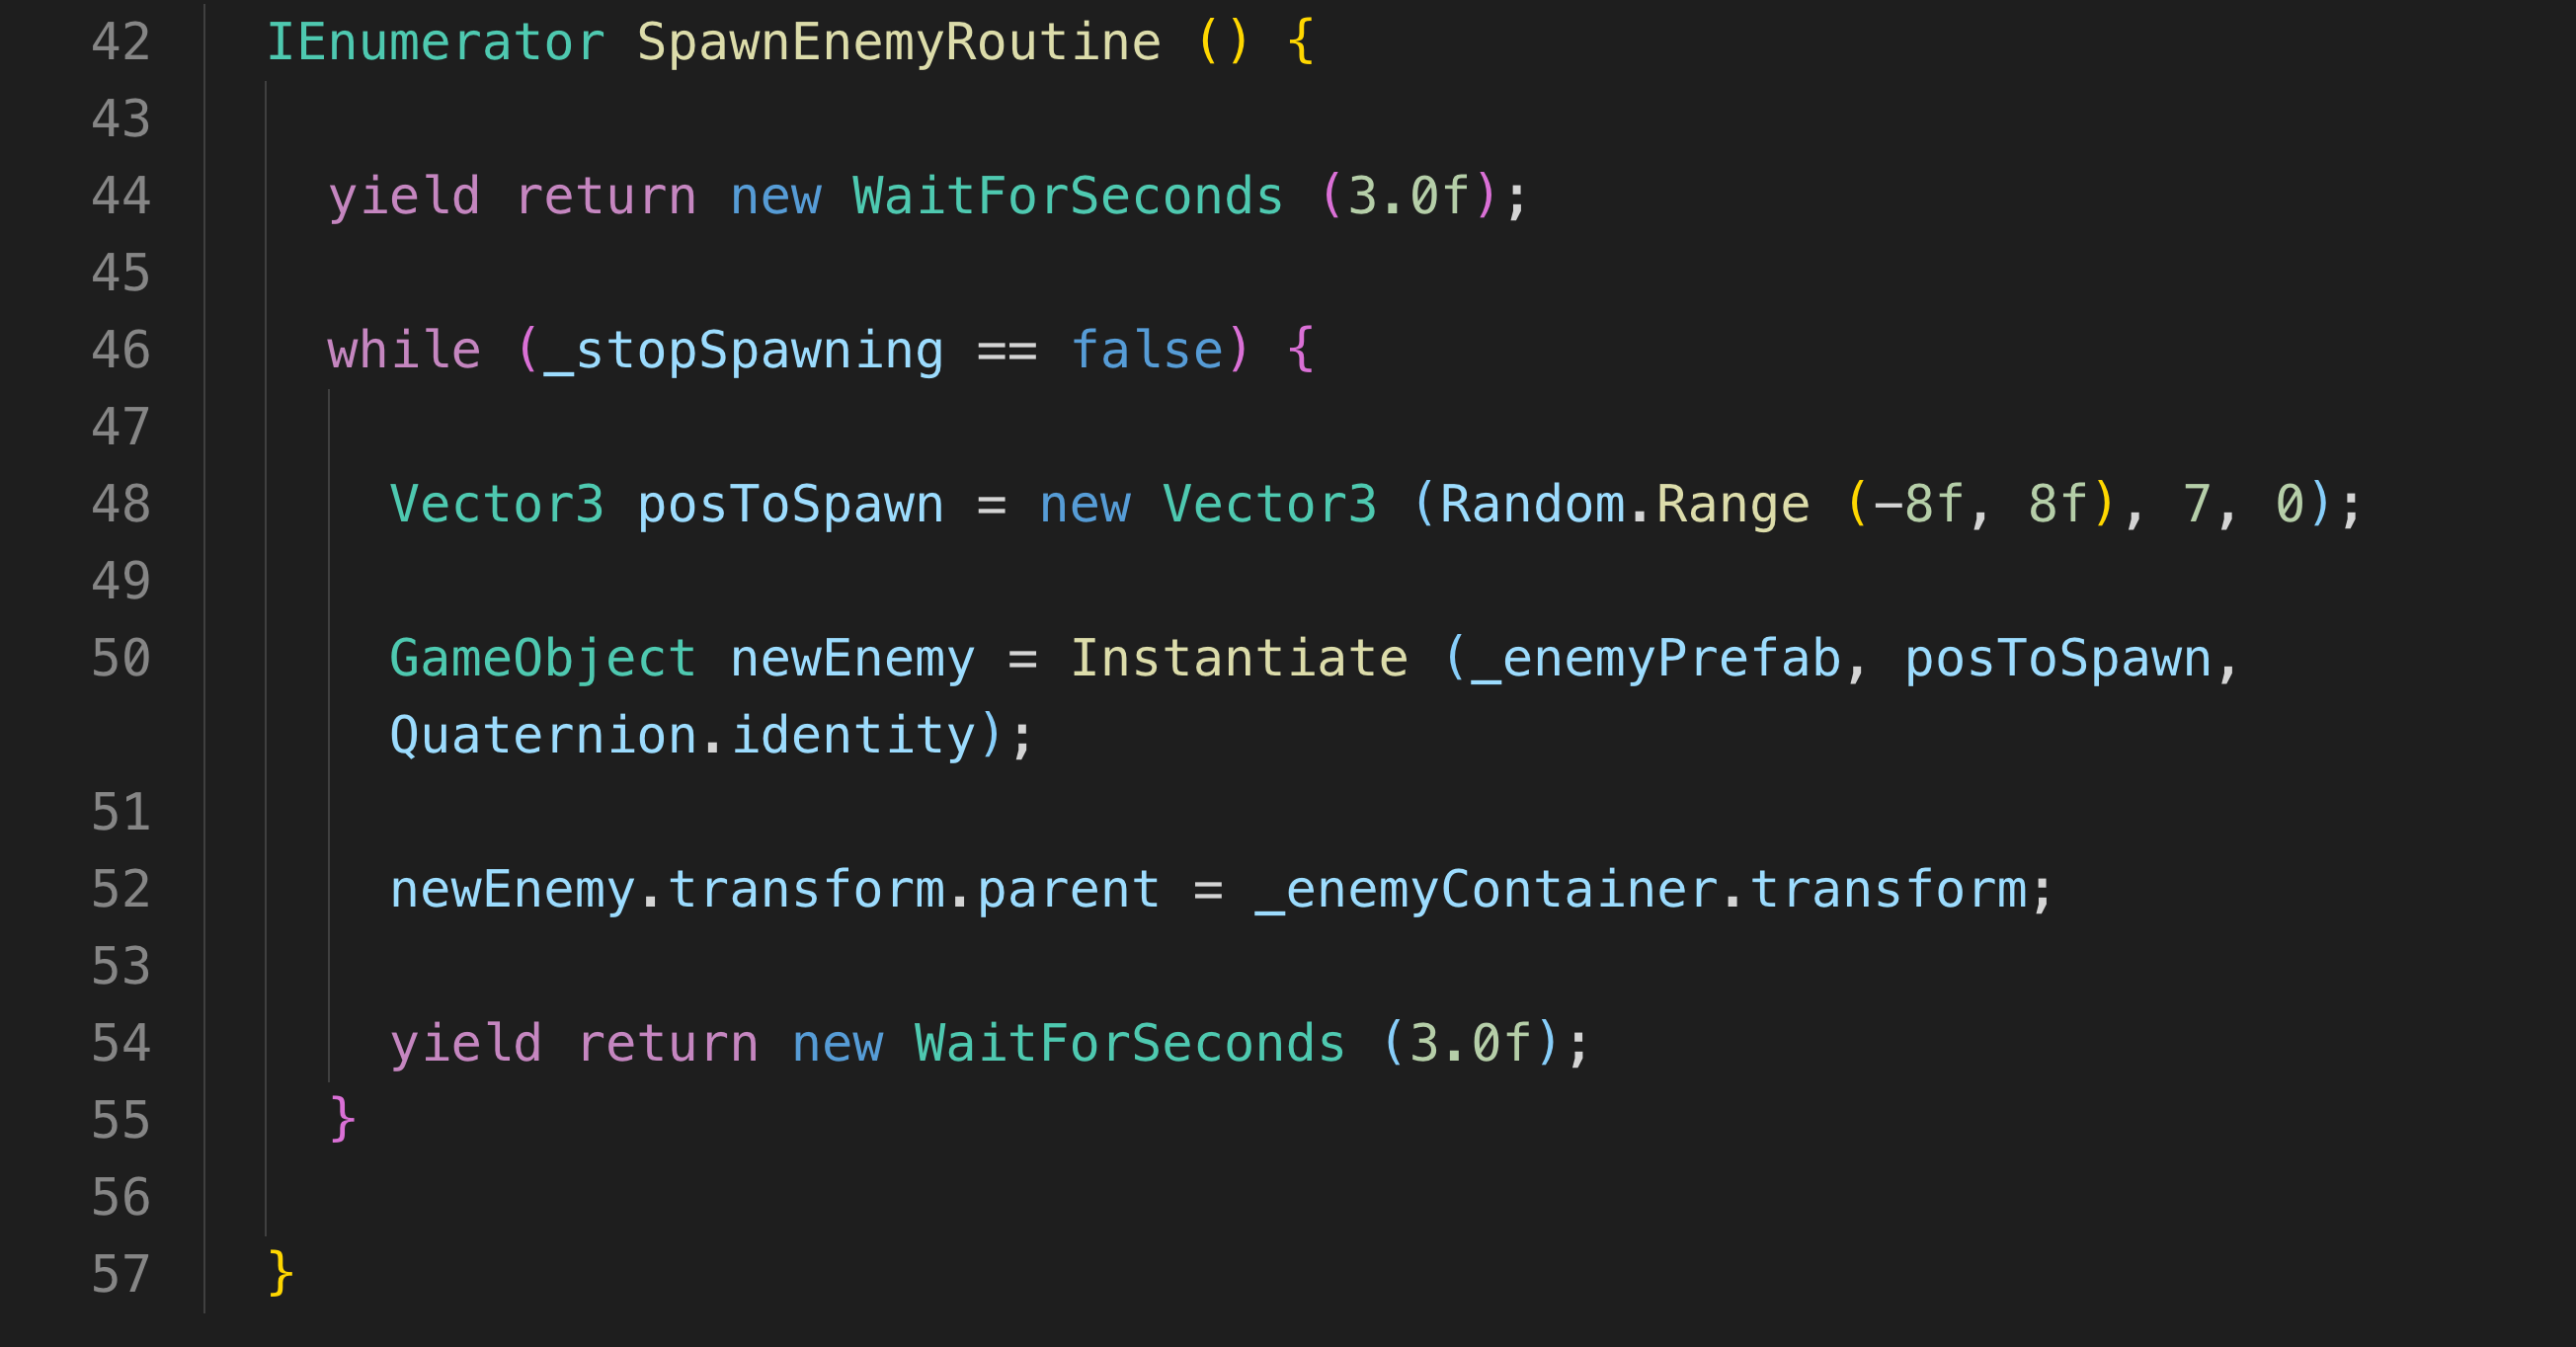
I used a coroutine to have an enemy spawn every 3 seconds. I use
the _stopSpawning bool to stop enemies from spawning when the
game has ended. When the game ends, (because the player has
died), I change _stopSpawning to true which will stop lines
46-55 from executing.
On line 48, Random.Range() will genertate a random x position
(within the range of the screen, which I determined to be -8 to
8) for the enemy to spawn at.
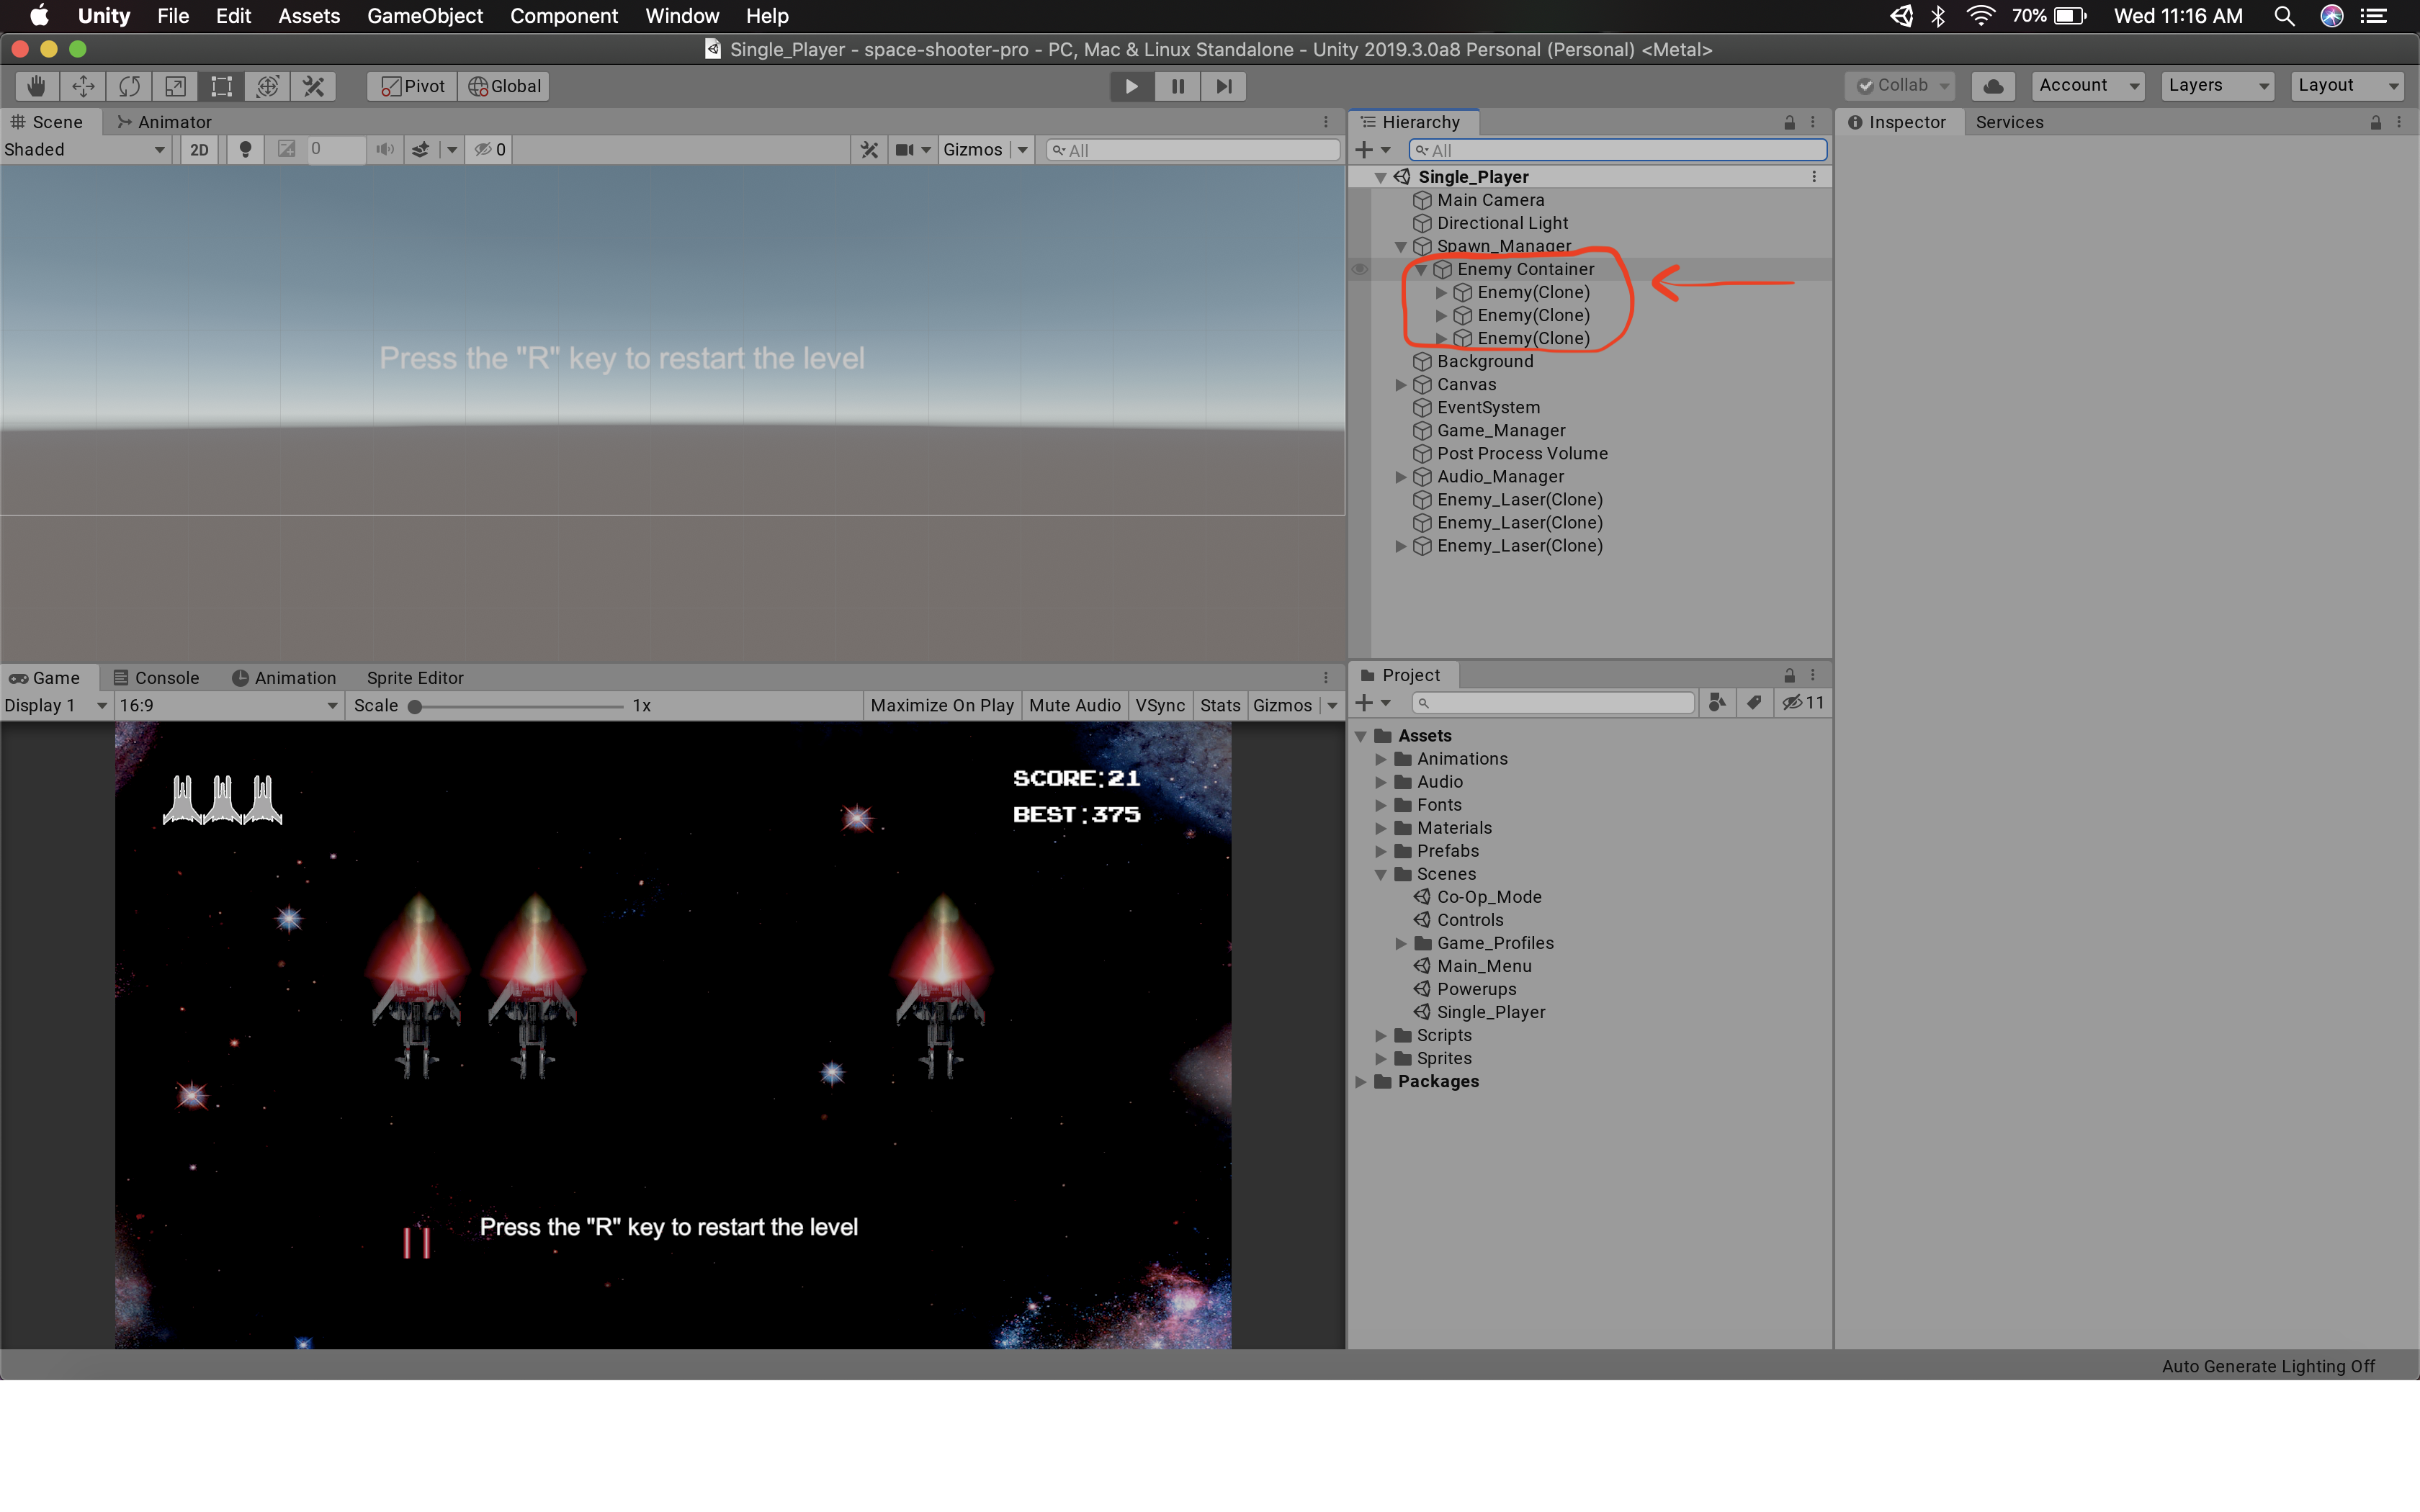
Line 52 will take the newly spawned Enemy and parent it to a
container object in Unity so that the hierarchy won't be
cluttered with Enemy objects
The arrow shows the container object used to hold all spawned enemies.
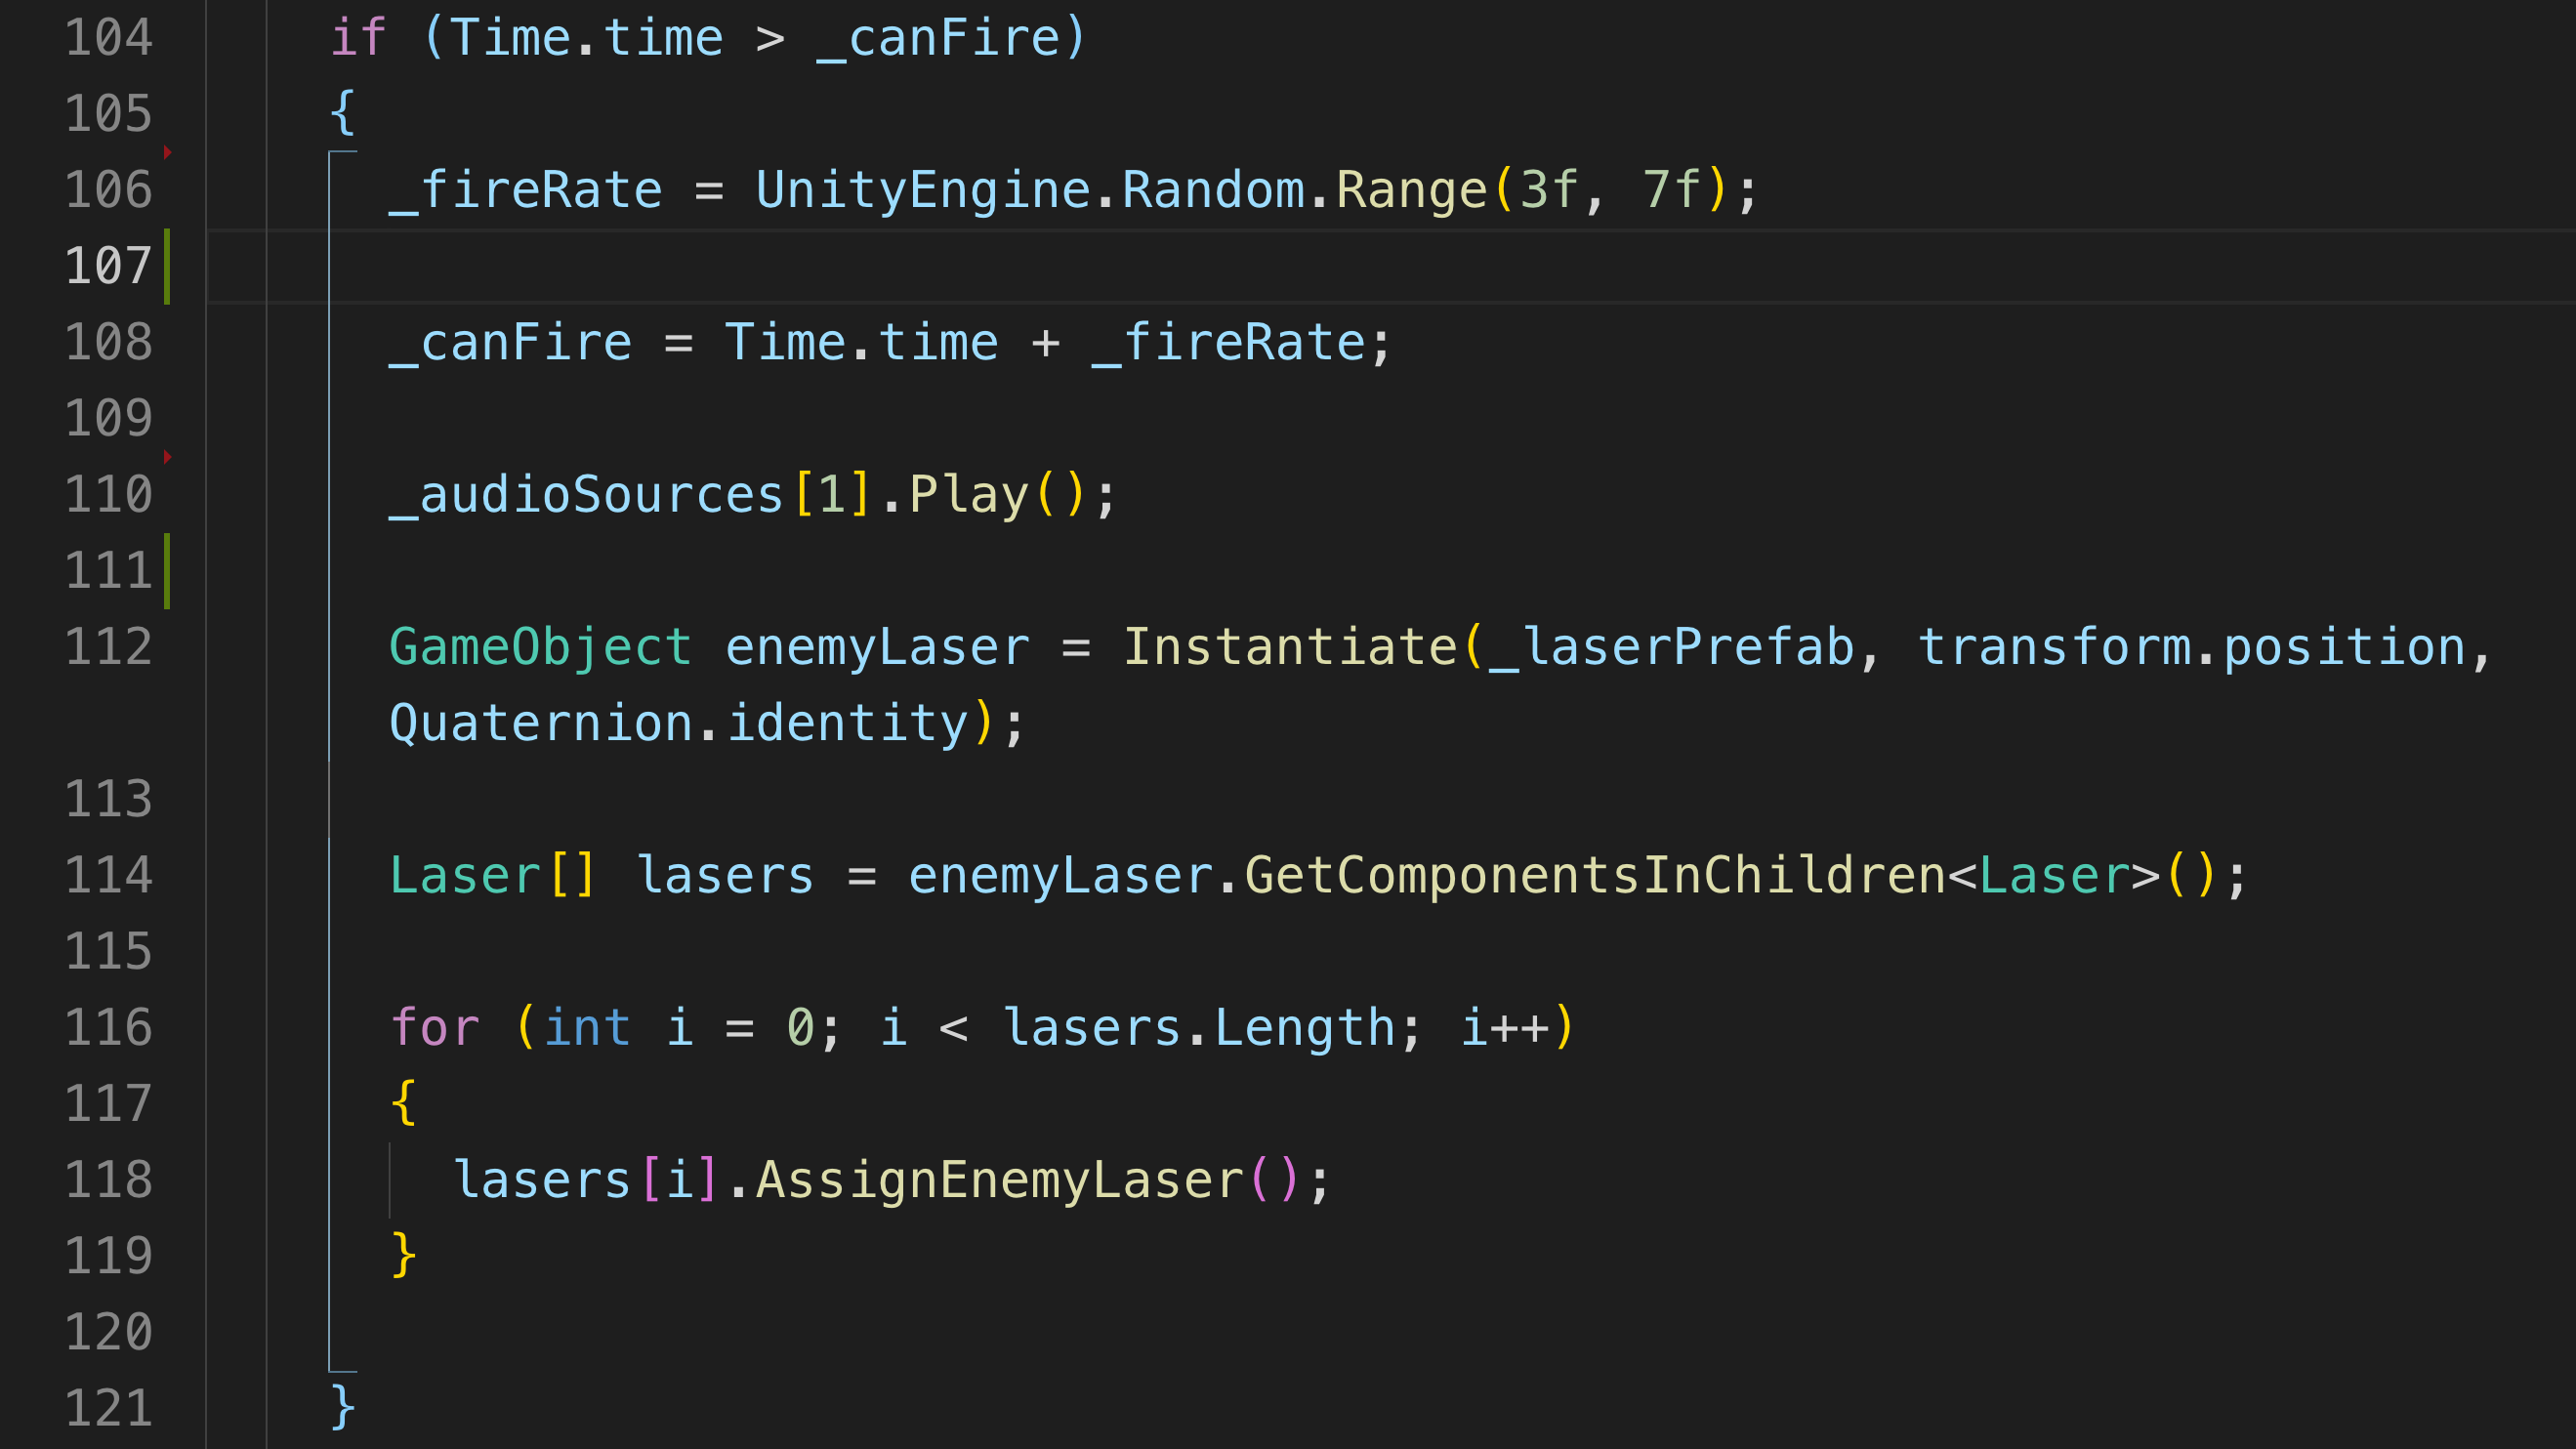
The enemy attacks are very similar to the player's except that
the rate at which they fire is randomized, so the player can't
memorize the enemy's attack pattern.
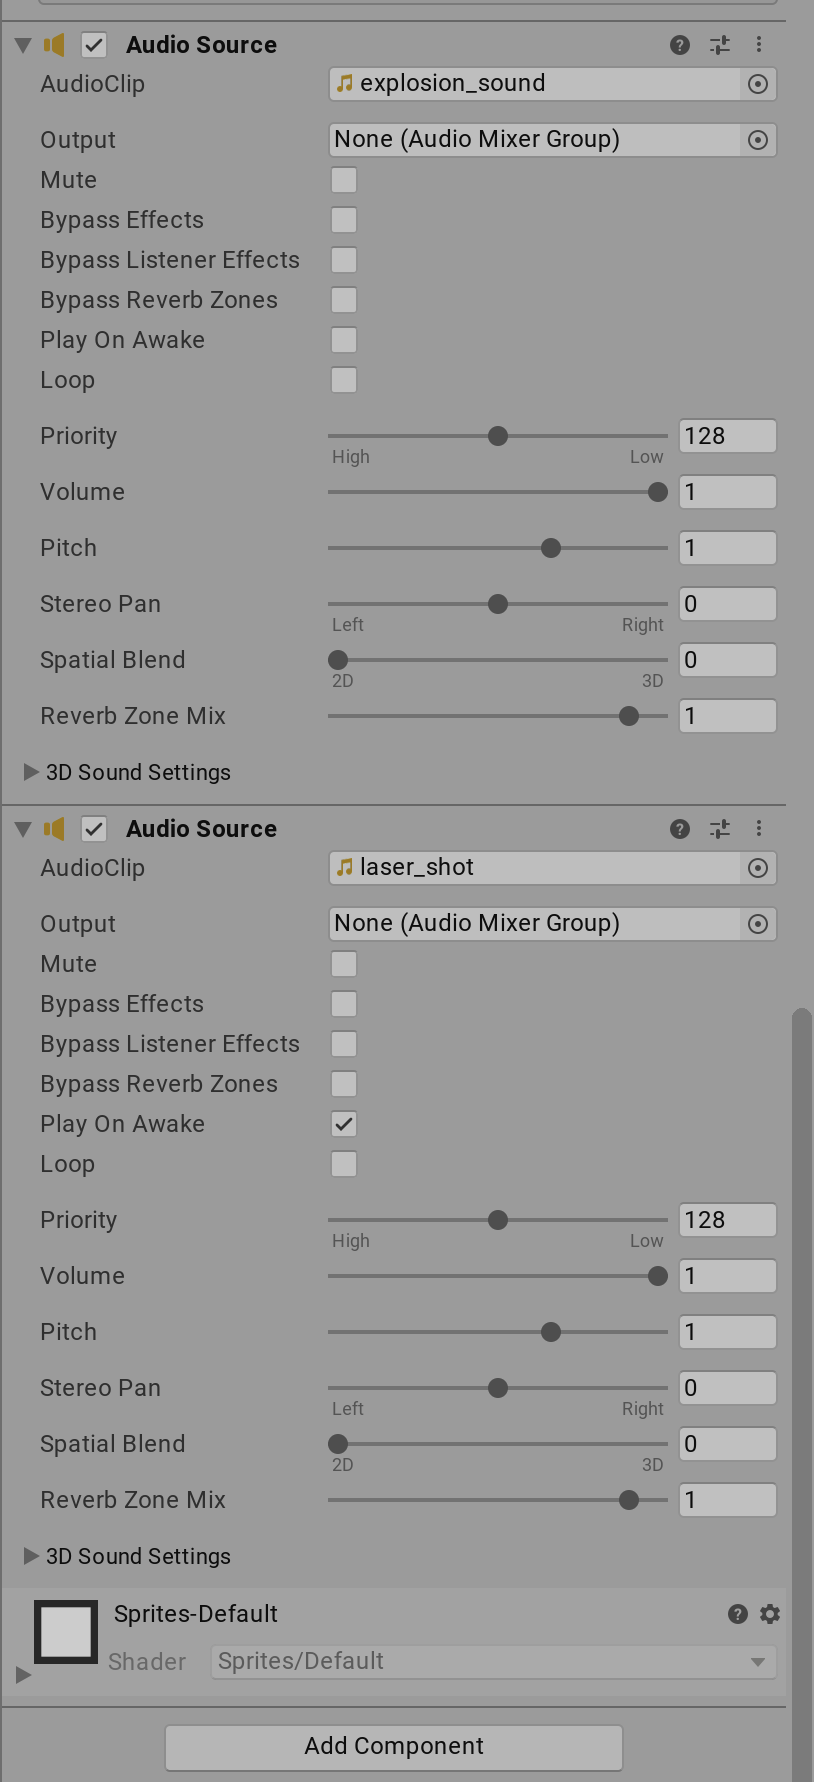
On line 110, I am accessing an array of audio sources that are
on the enemy object. I have 2 as shown below: 1 for the
enemy's explosion sound and the other for it's laser sound.
On line 112 I use a prefab to instantiate the enemy's laser.
That prefab I assigned is an object that holds 2 of the laser
objects (also used by the player), giving the enemy a dual
laser to shoot.
The arrow shows the container object used to hold all spawned enemies.
Here are the enemy's audio sources:
Below is some information on collisions between the player, power ups and enemies. They allow us to do things like applying a power up effect when collecting a power up and destroying objects with lasers.
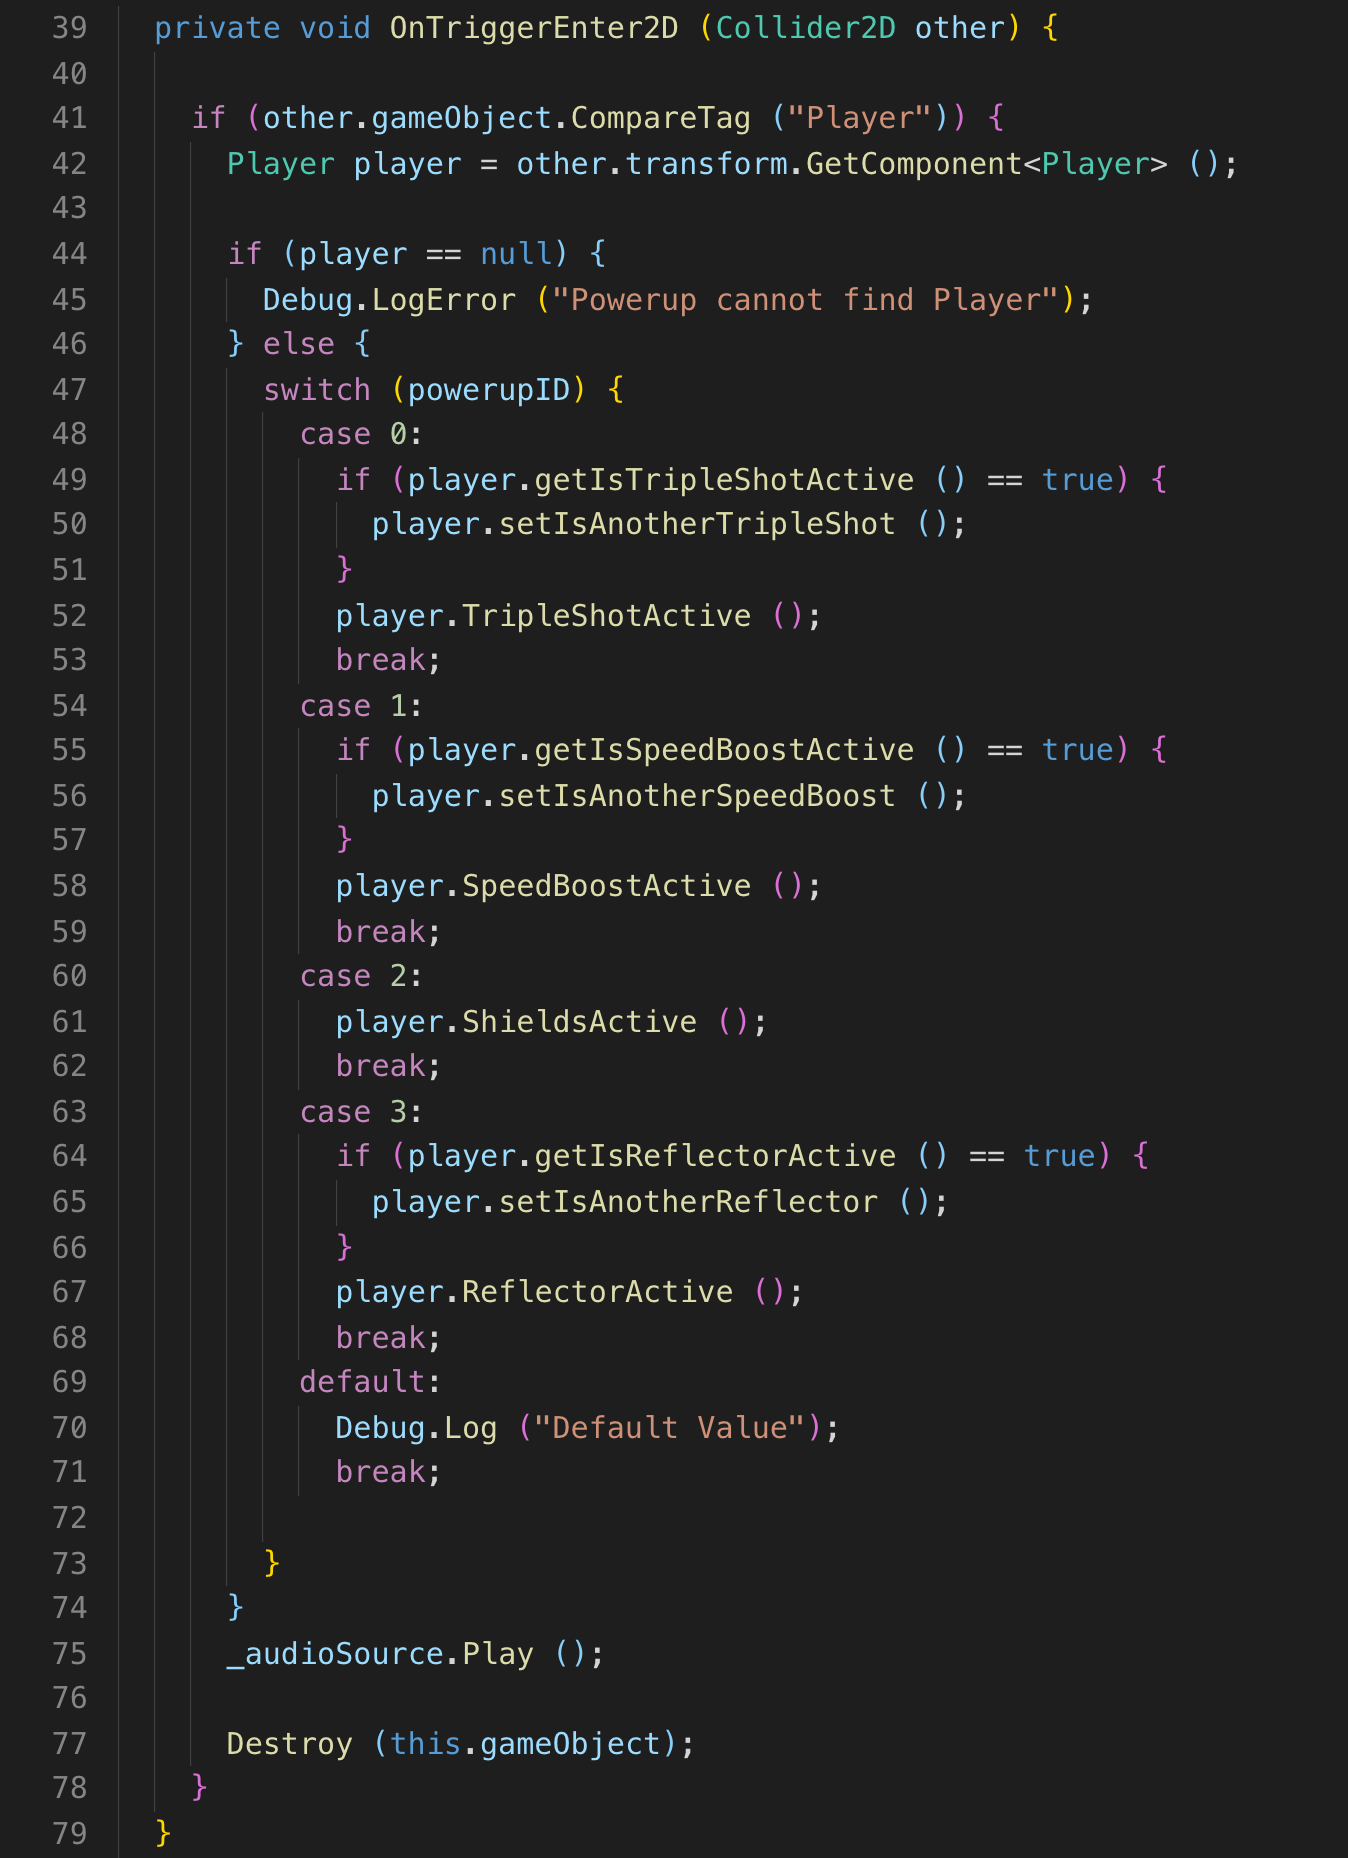
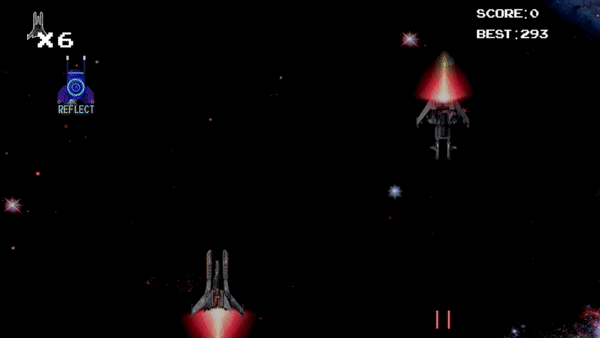
Power Up Collisions - The player gets certain abilities depending on which power up they collected.
Since this is a 2D game, I am using Unity's OnTriggerEnter2D()
method to detect & react to collisions. I used that instead of
OnCollisionEnter2D() because the power up will serve as a
trigger. Meaning, I don't want to apply a force on the player
when the power up collides with it (if it did that, the power
up would push the player back as if the power up damages the
player when they collect it).
On line 47, a switch statement is used to change one of the
player's bools depending on the incoming powerupID (which is
determined by which power up the player collected).
Laser Collisions
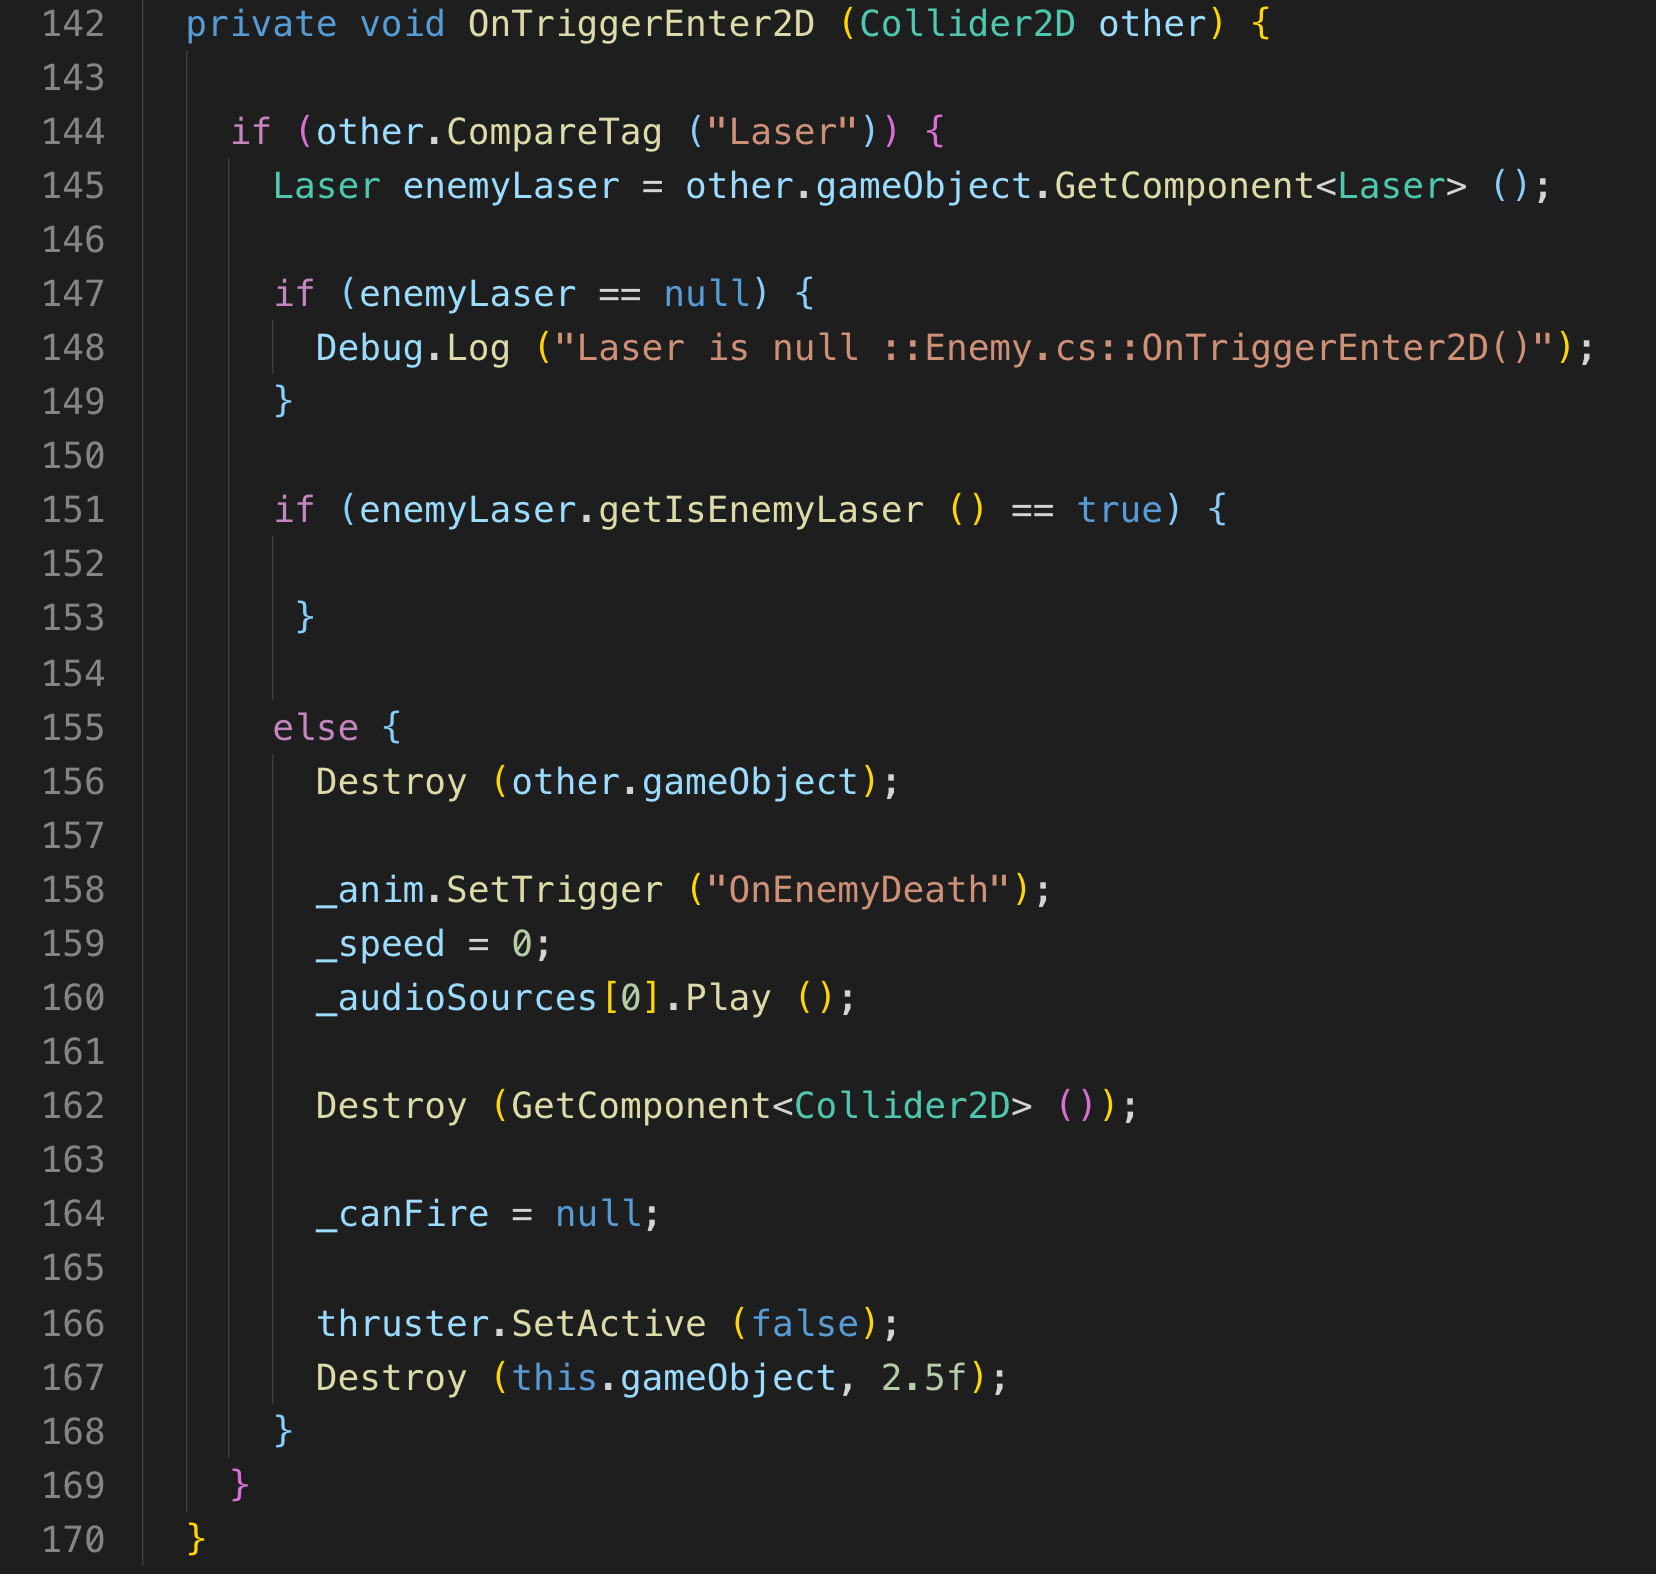
When the player's laser collides with an object, the laser is
destroyed first (line 156)the enemy's speed is set to 0 to
stop it from moving while destroyed(line 159) the enemy's
collider is destroyed (line 162), then we destroy the enemy
object (line 167). The order of destruction is important
because if we destroyed the enemy object first, this code is
destroyed with it(because it is attached to the enemy object
with the Enemy.cs script) and won't run.
On line 151, I am checking to see if the laser that collided
with the enemy is an enemy laser. If it is, do nothing so that
other enemies can't destroy this enemy.
On line 167, I passed in the amount of time to wait as the
second argument before destroying the enemy object. This is to
give the explosion animation and sound effect time to play
before the enemy is destroyed.
Enemy Collisions with Player
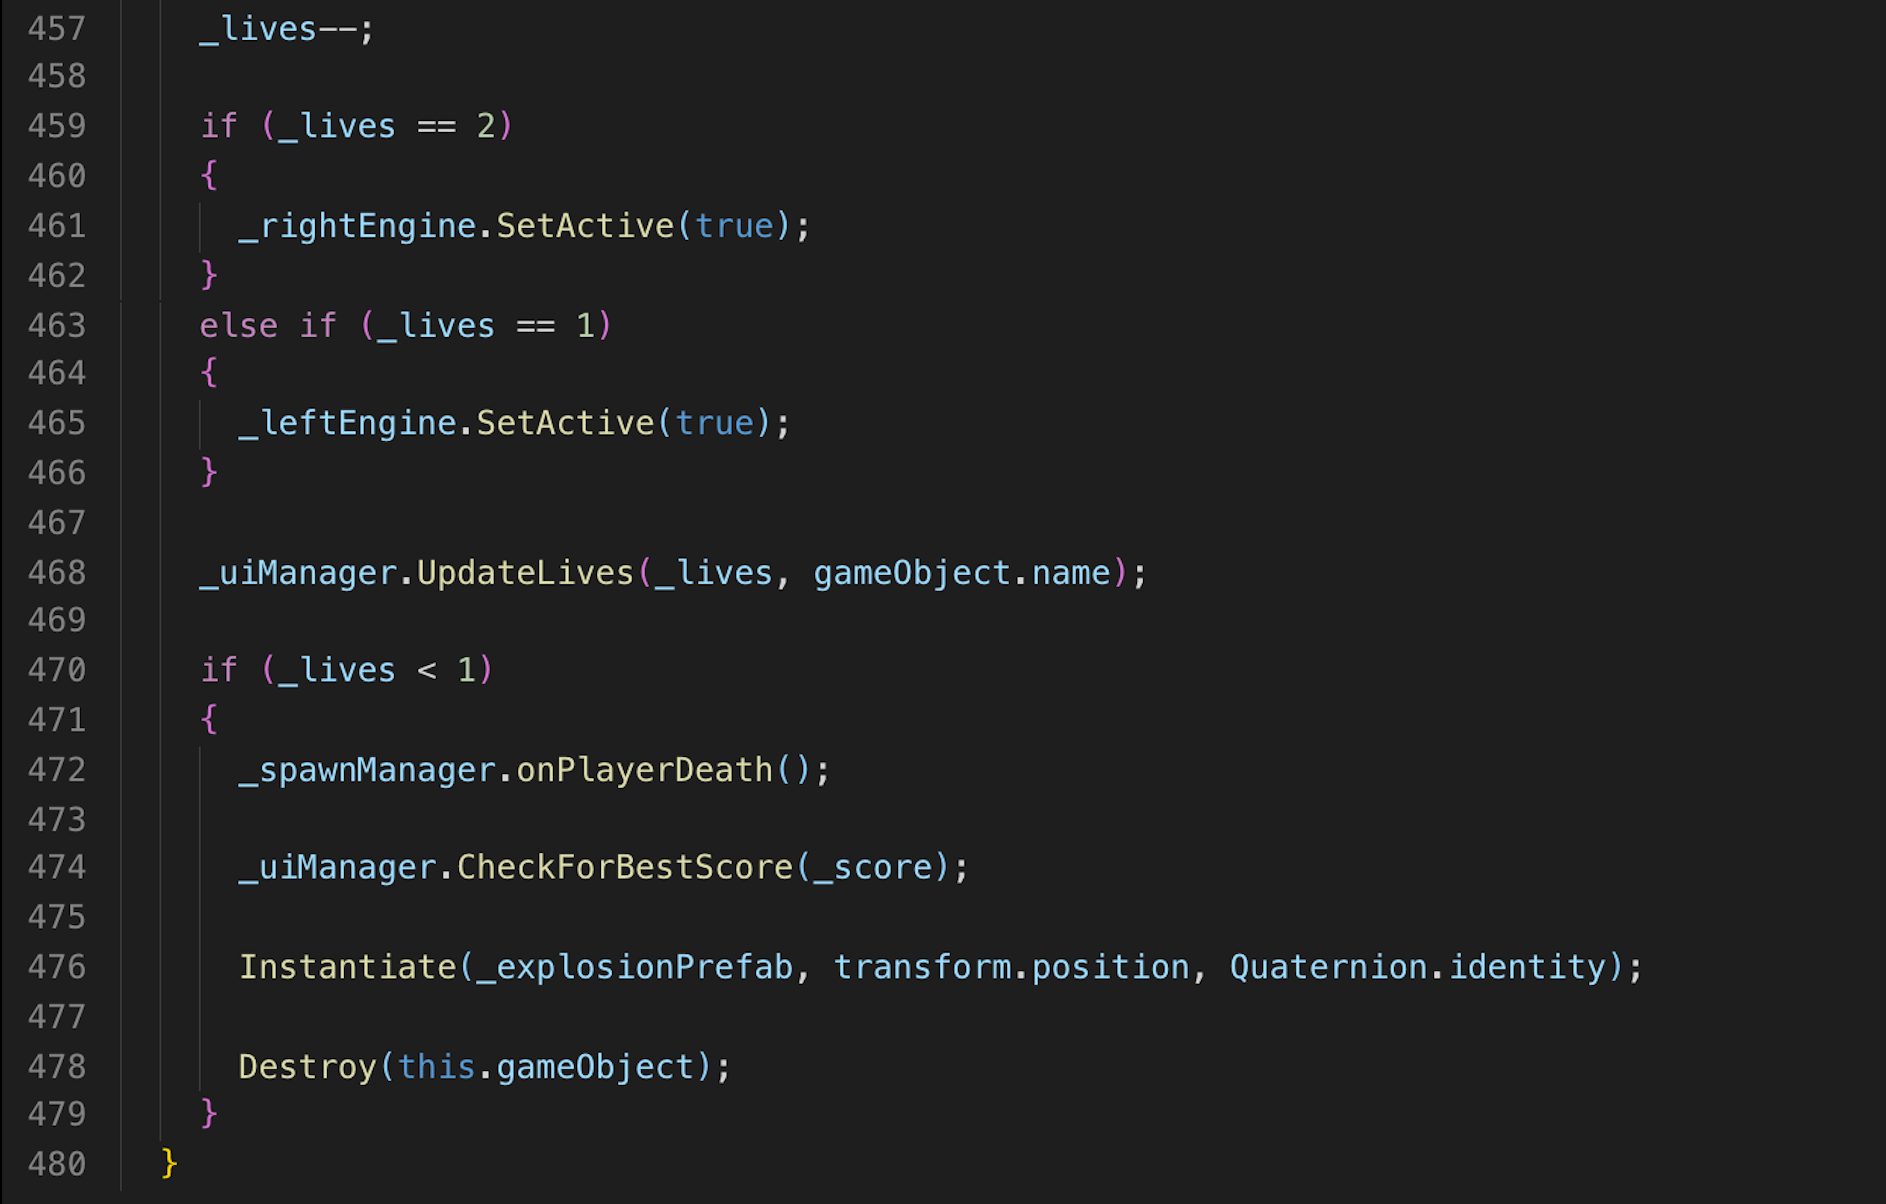
When an enemy collides with the player, we award points to the player while also damaging them as shown in lines 129-133.

Below is some code from the Damage() method (as you saw being
called above) in the Player script. The Player script has a
_lives variable to tell how many lives the player has.
Line 457 makes sure the player loses a life when they take
damage.
Lines 459-466 is used to show visually, the damage the player
has taken. When we have 2 lives, the right engine is damaged.
When we have 1 life left, the left engine is damaged. The
damaged right and left engines are actually child objects to
the player that are inactive by default. I set them active
depending on how many lives the player has.
On lines 470-479, I am checking if the player has no lives
left, and if that is true, the player is destroyed (which will
also terminate this script).
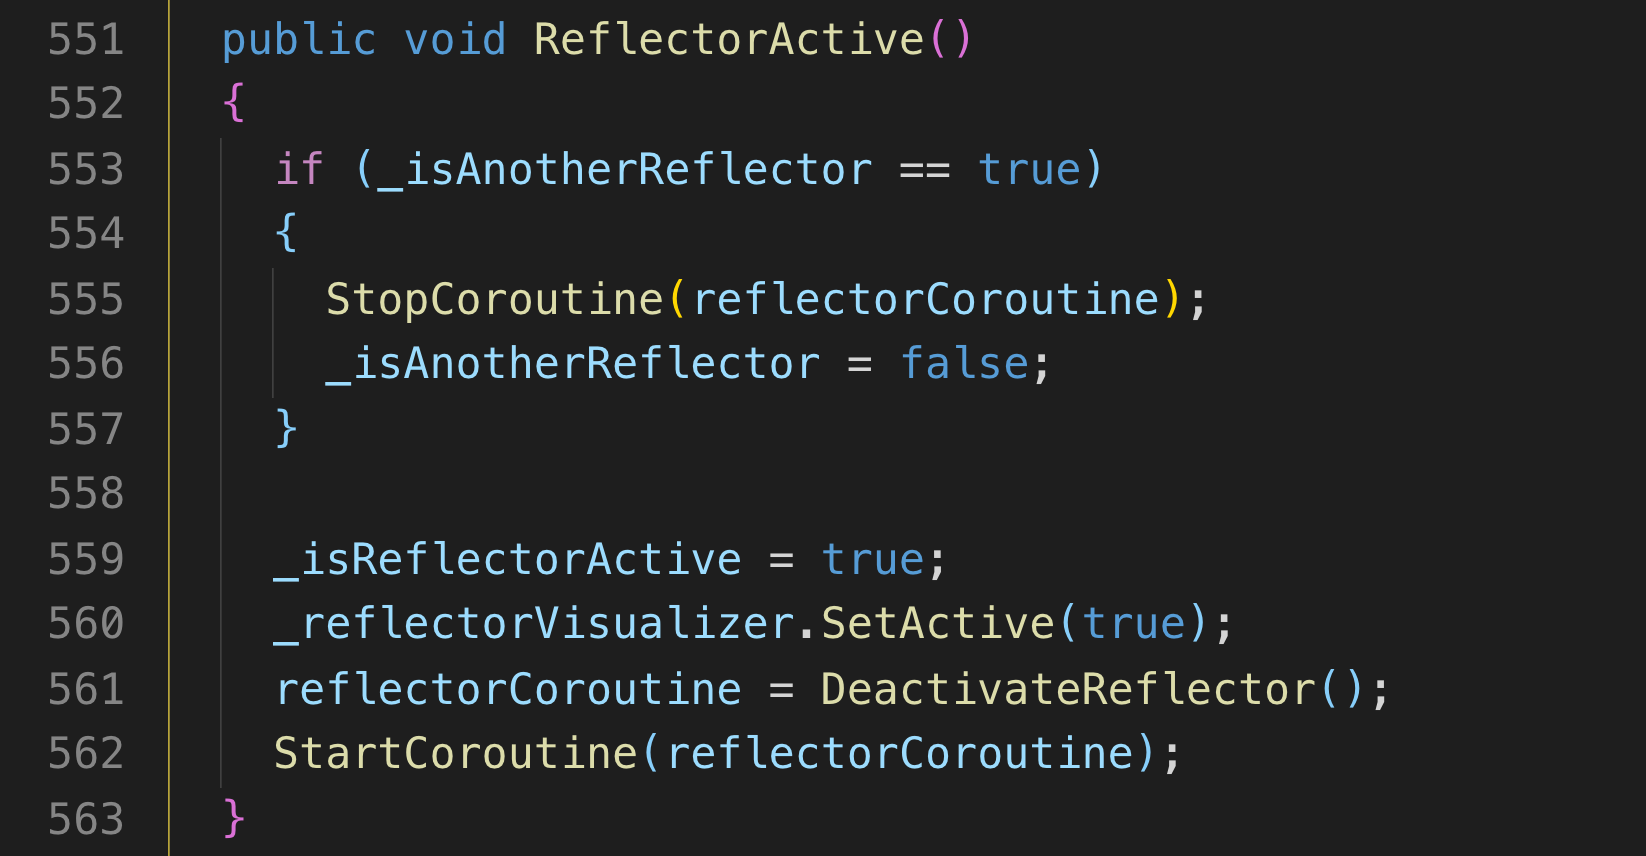
My ReflectorActive() method, activates the reflector by
changing the _isReflectorActive bool to true on line 559.
On lines 561-562 I am using a coroutine (which you can see in
the next snippet) to wait 10 seconds and then deactivate the
reflector.
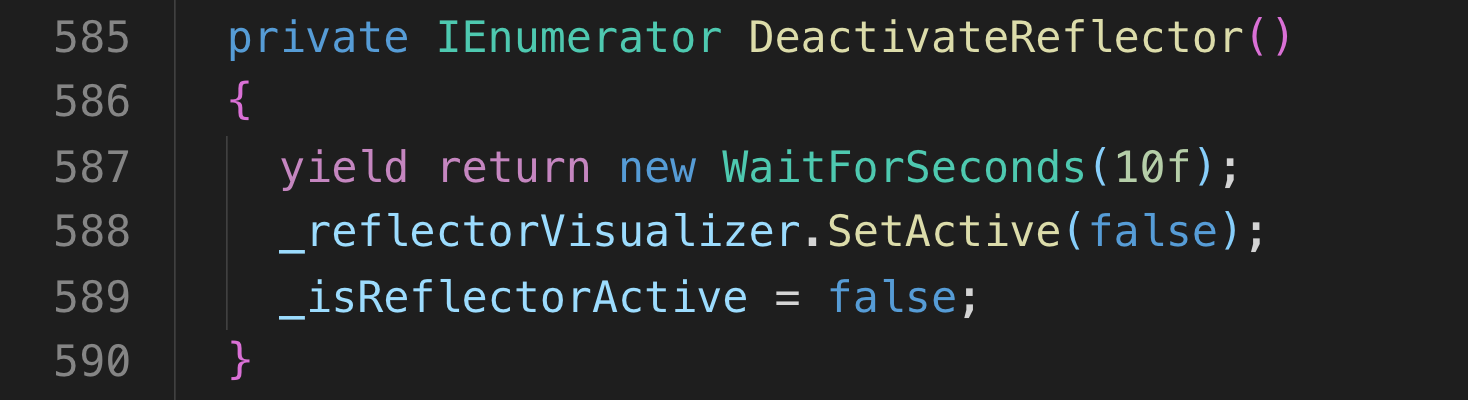
Below is the DeactivateReflector() coroutine. It turns off the Reflector's animation and sets it's bool to false. That way, all the code in my Player script that is dependent on this bool stops executing.
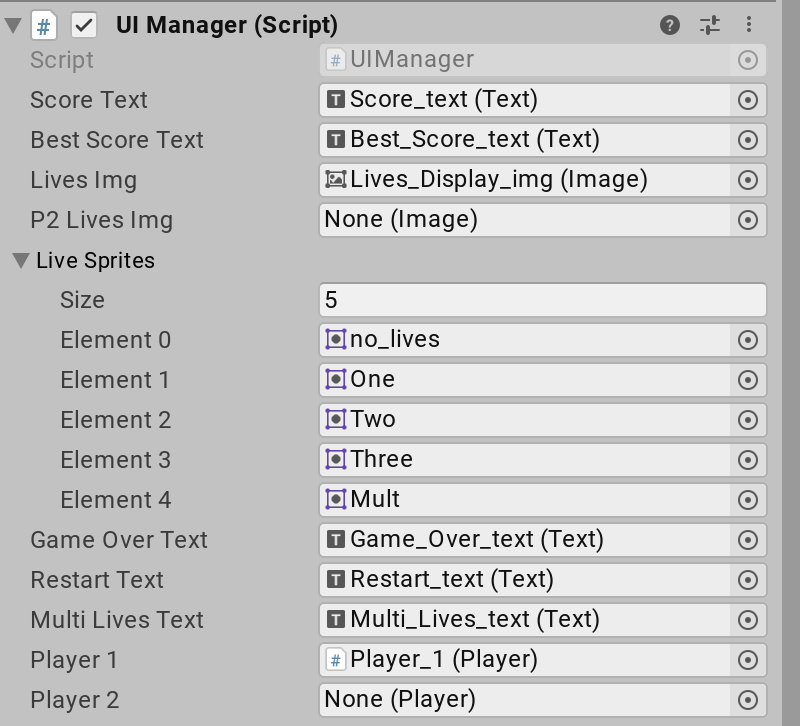
Here is the UI Manager component from Unity's Inspector:
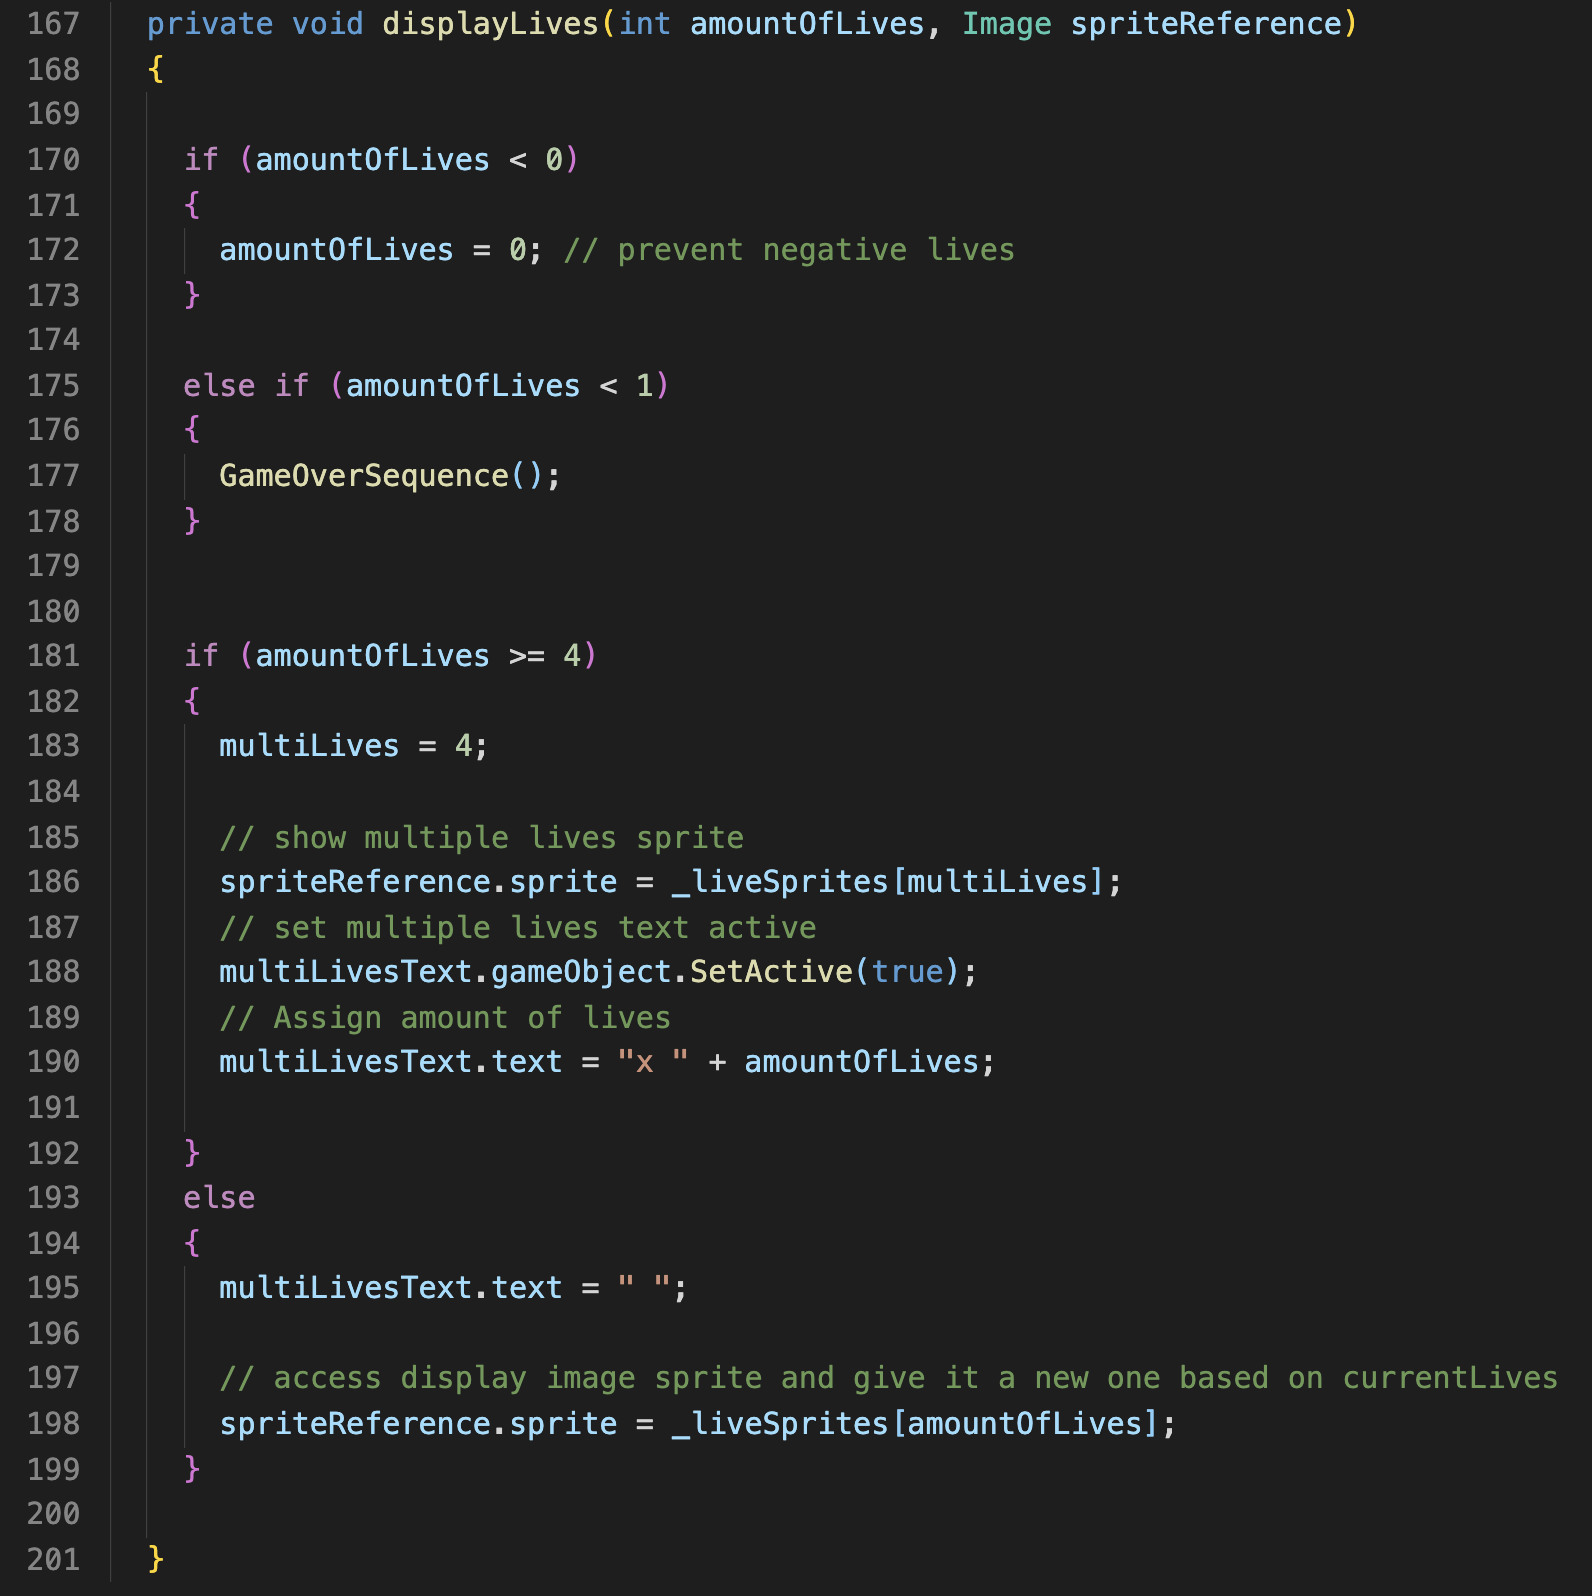
On line 181 of this method it takes in the amount of lives
remaining and displays a sprite on the top left of the screen
to represent that. If the amount of lives is greater or equal
to 4, it displays a one ship sprite followed by that number.
Otherwise, it will display the 3 ship sprite if 3 lives
remaining, the 2 ship sprite if 2 remain, etc.
It finds the sprite in a Sprite array I have declared as a
global variable. You can see in the UI Manager component image
above that this array is called "Lives Sprites" and has 5
sprites assigned to it named "no_lives","One", "Two", "Three",
and "Mult".
I use multiLives variable to access the "Mult" sprite in the
array and the amountOfLives variable to access the rest by
passing that variable's value in as the index. After I get the
number of lives to display, I access the Text object in my
scene and pass that value into a string on line 190. On line
196 I set the Text object to an empty string because if I get
to that line the player has under 4 lives left, so I just want
to display a sprite.
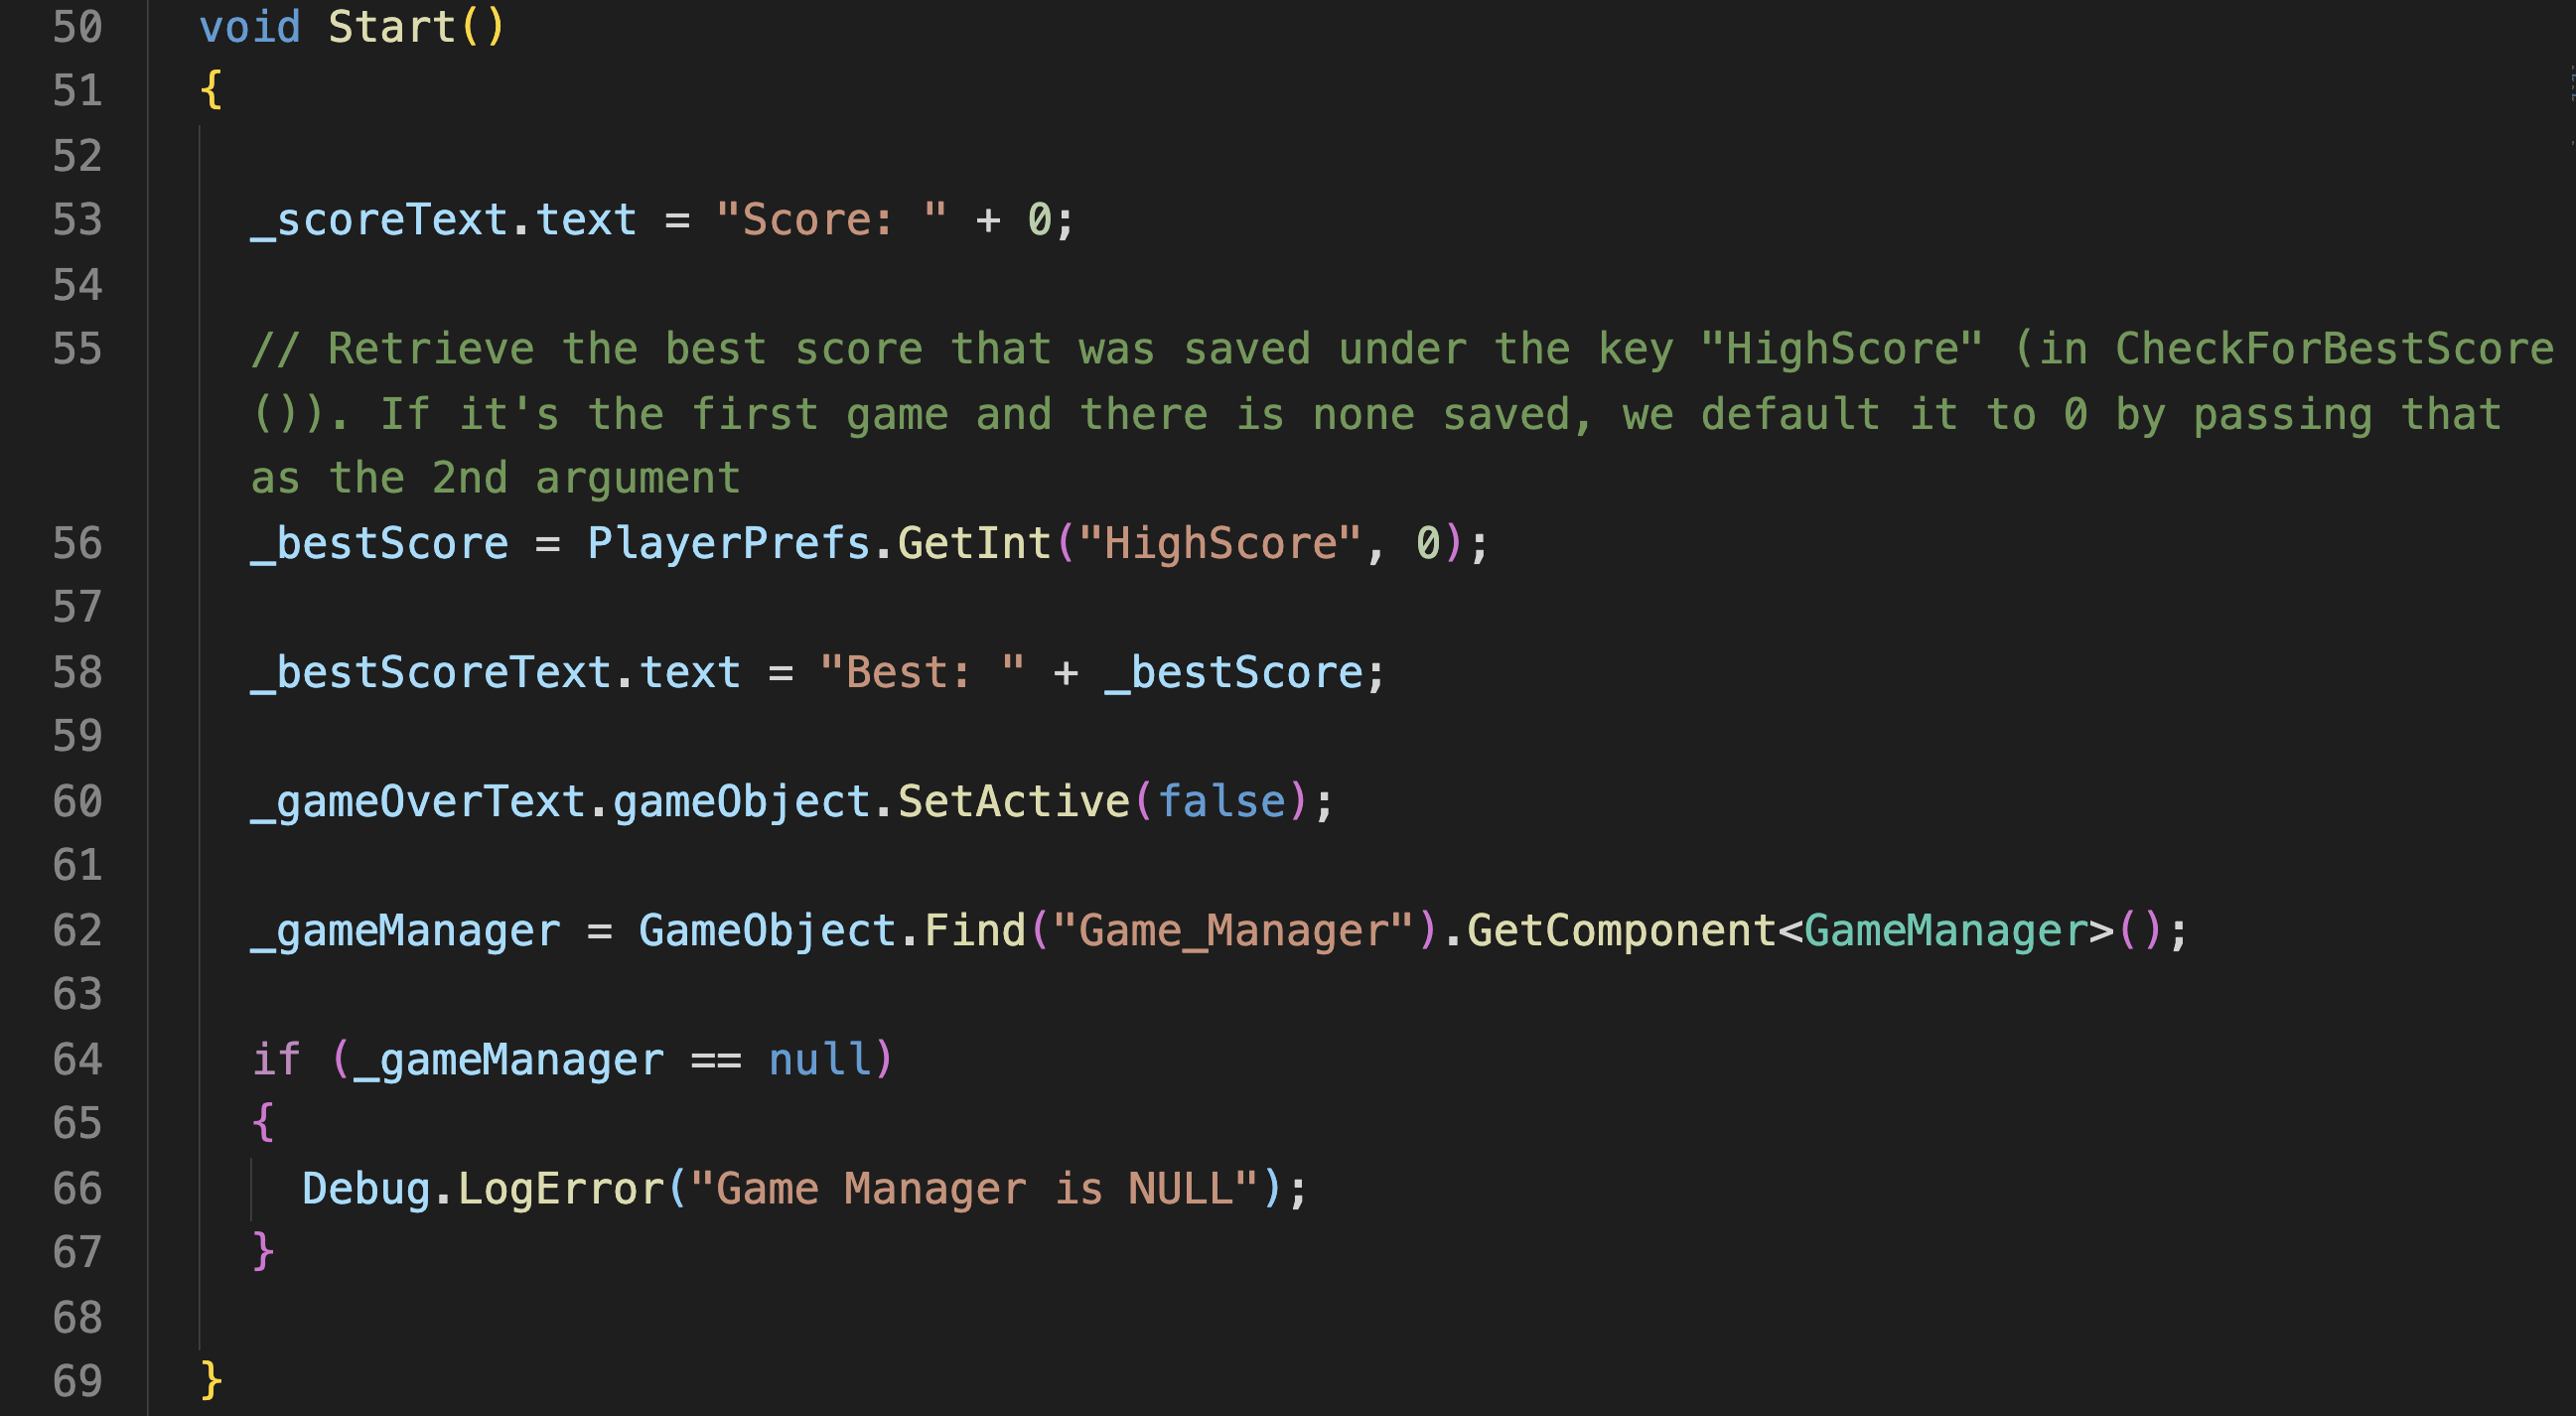
In my Start() method of the UIManager script, I default the
score to 0 at the beginning of the game on line 53.
On line 56, I retrieve the best score by using PlayerPrefs and
display that using line 58.
PlayerPrefs stores simple data, such as the highest score, so
we can display it if the player starts a new game.
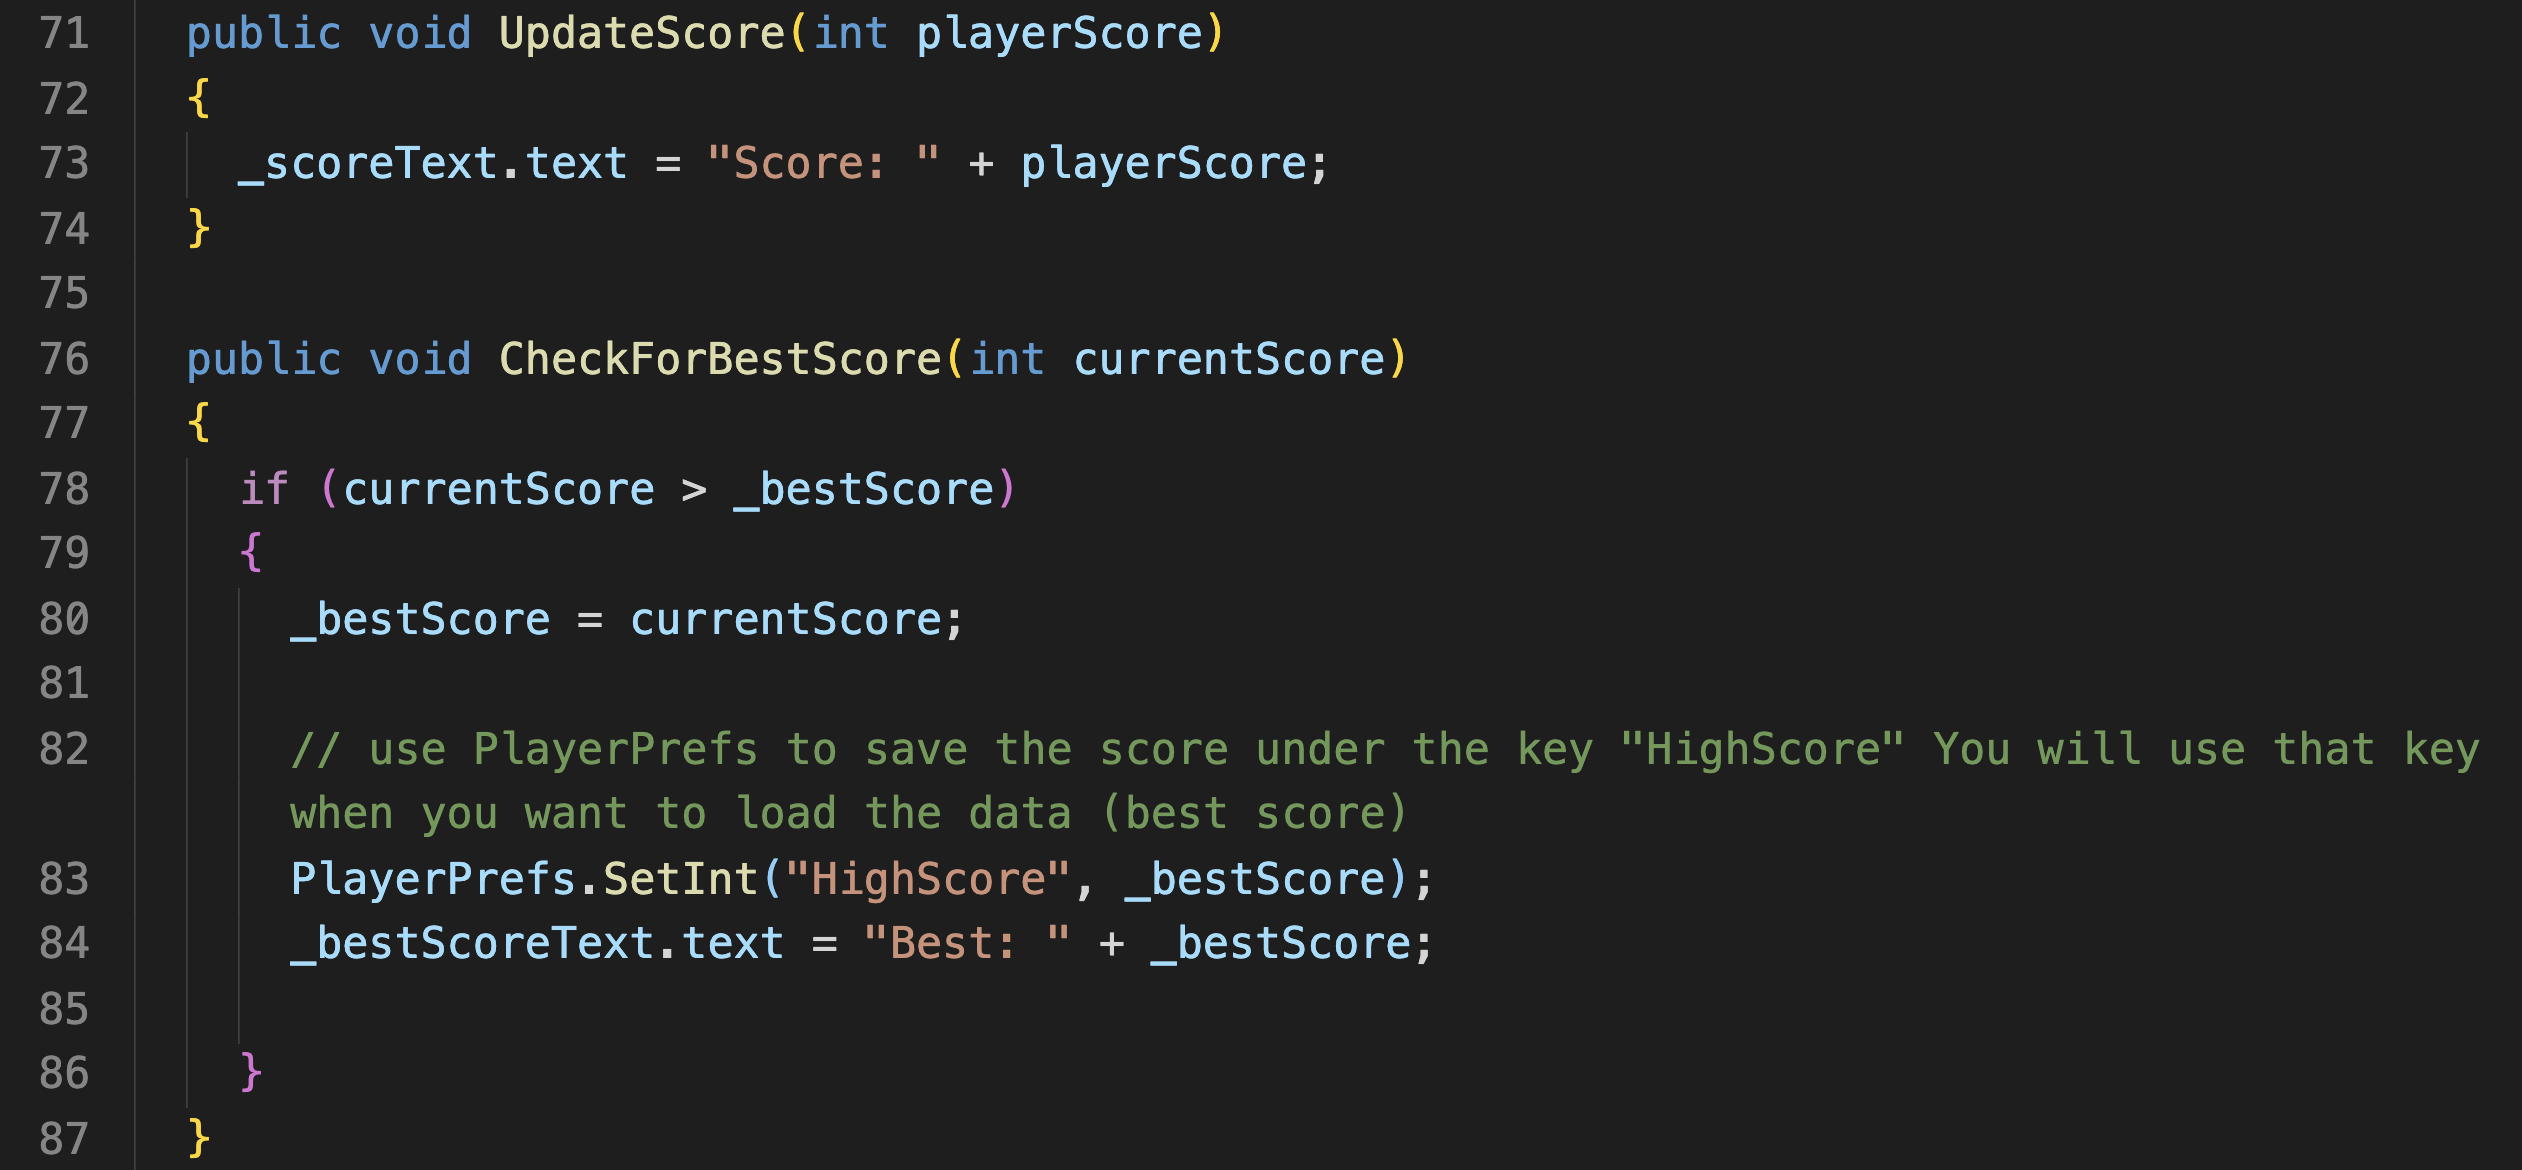
Below are 2 methods that deal with updating the current game's score and the best score (stored using PlayerPrefs). UpdateScore() is pretty simple, it just changes the display to match what you pass in. BestScore() checks if the score you pass in is greater than the best score that is stored using PlayerPrefs and updates it if it greater.
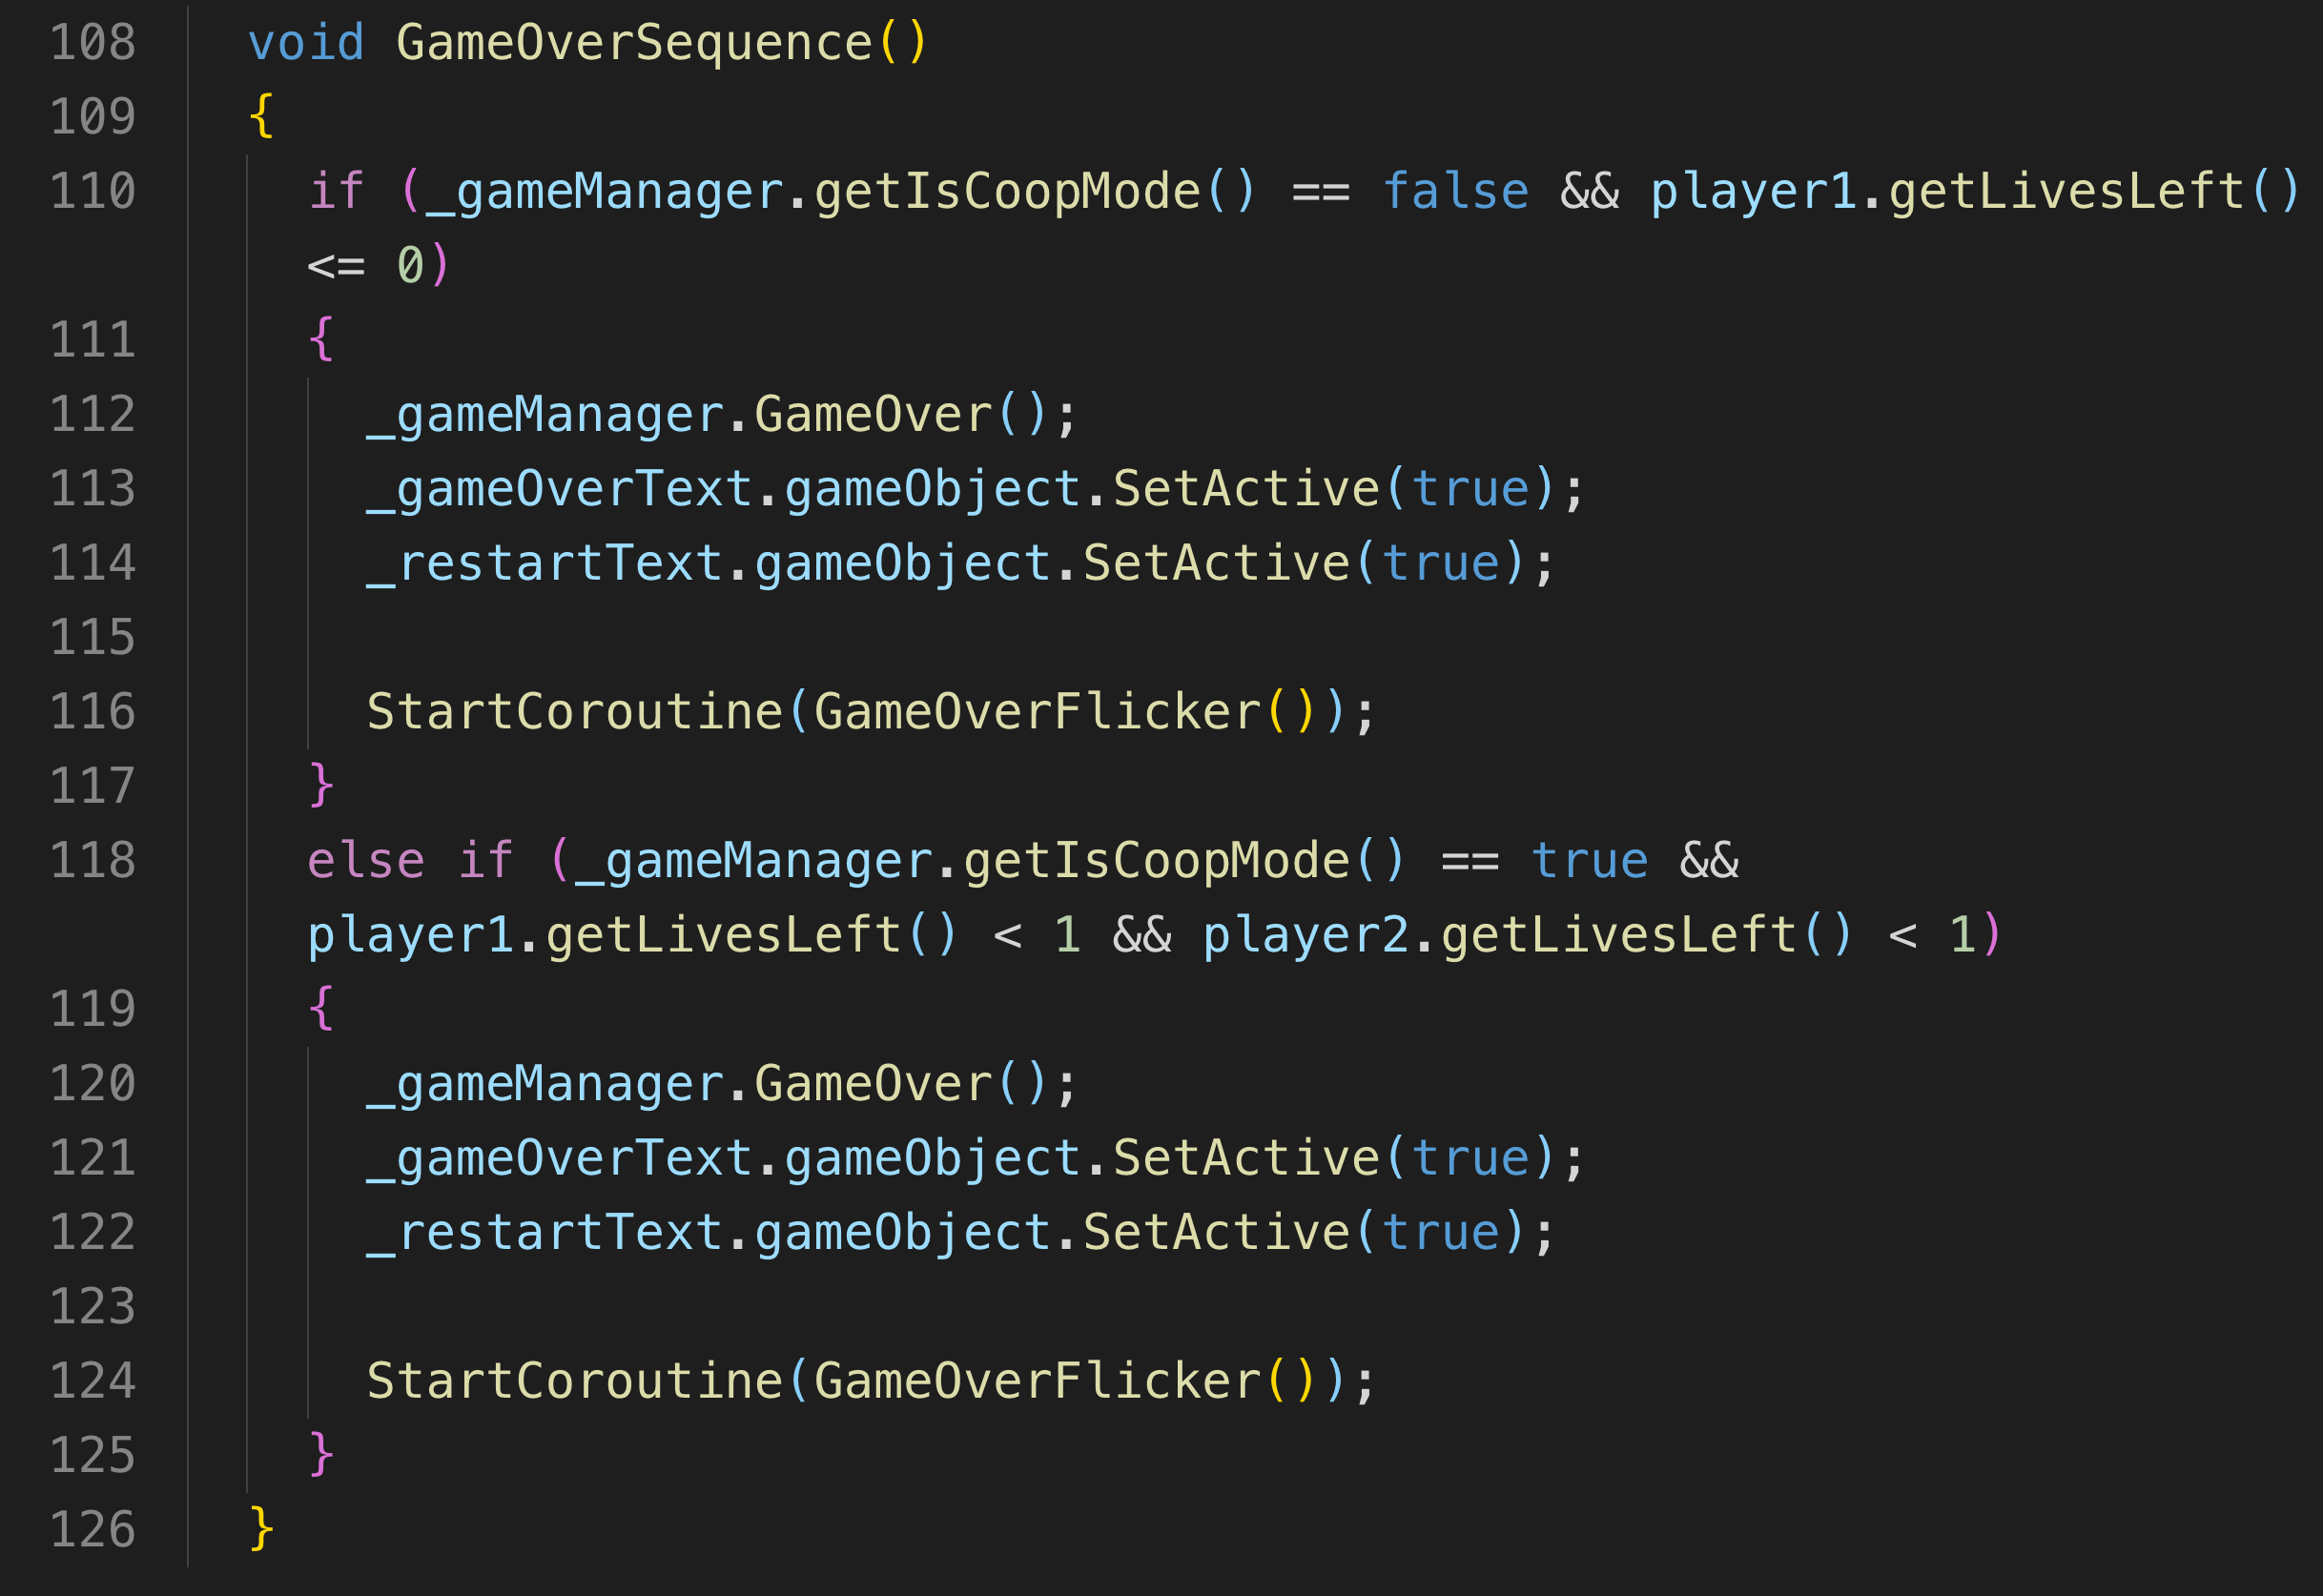
The snippet below is from my UIManager script. Since I've
added a co-op mode to this game, I need to check if we are
playing a co-op game on line 110.
On lines 112, I switch the Game Manager's _isGameOver bool to
true using it's GameOver() method. This is so we can enter the
if statement in my GameManager script that lets us restart the
game by pressing the "R" key. However, the actual display of
the Game Over & Restart text happens in my UIManager script on
lines 113-114.
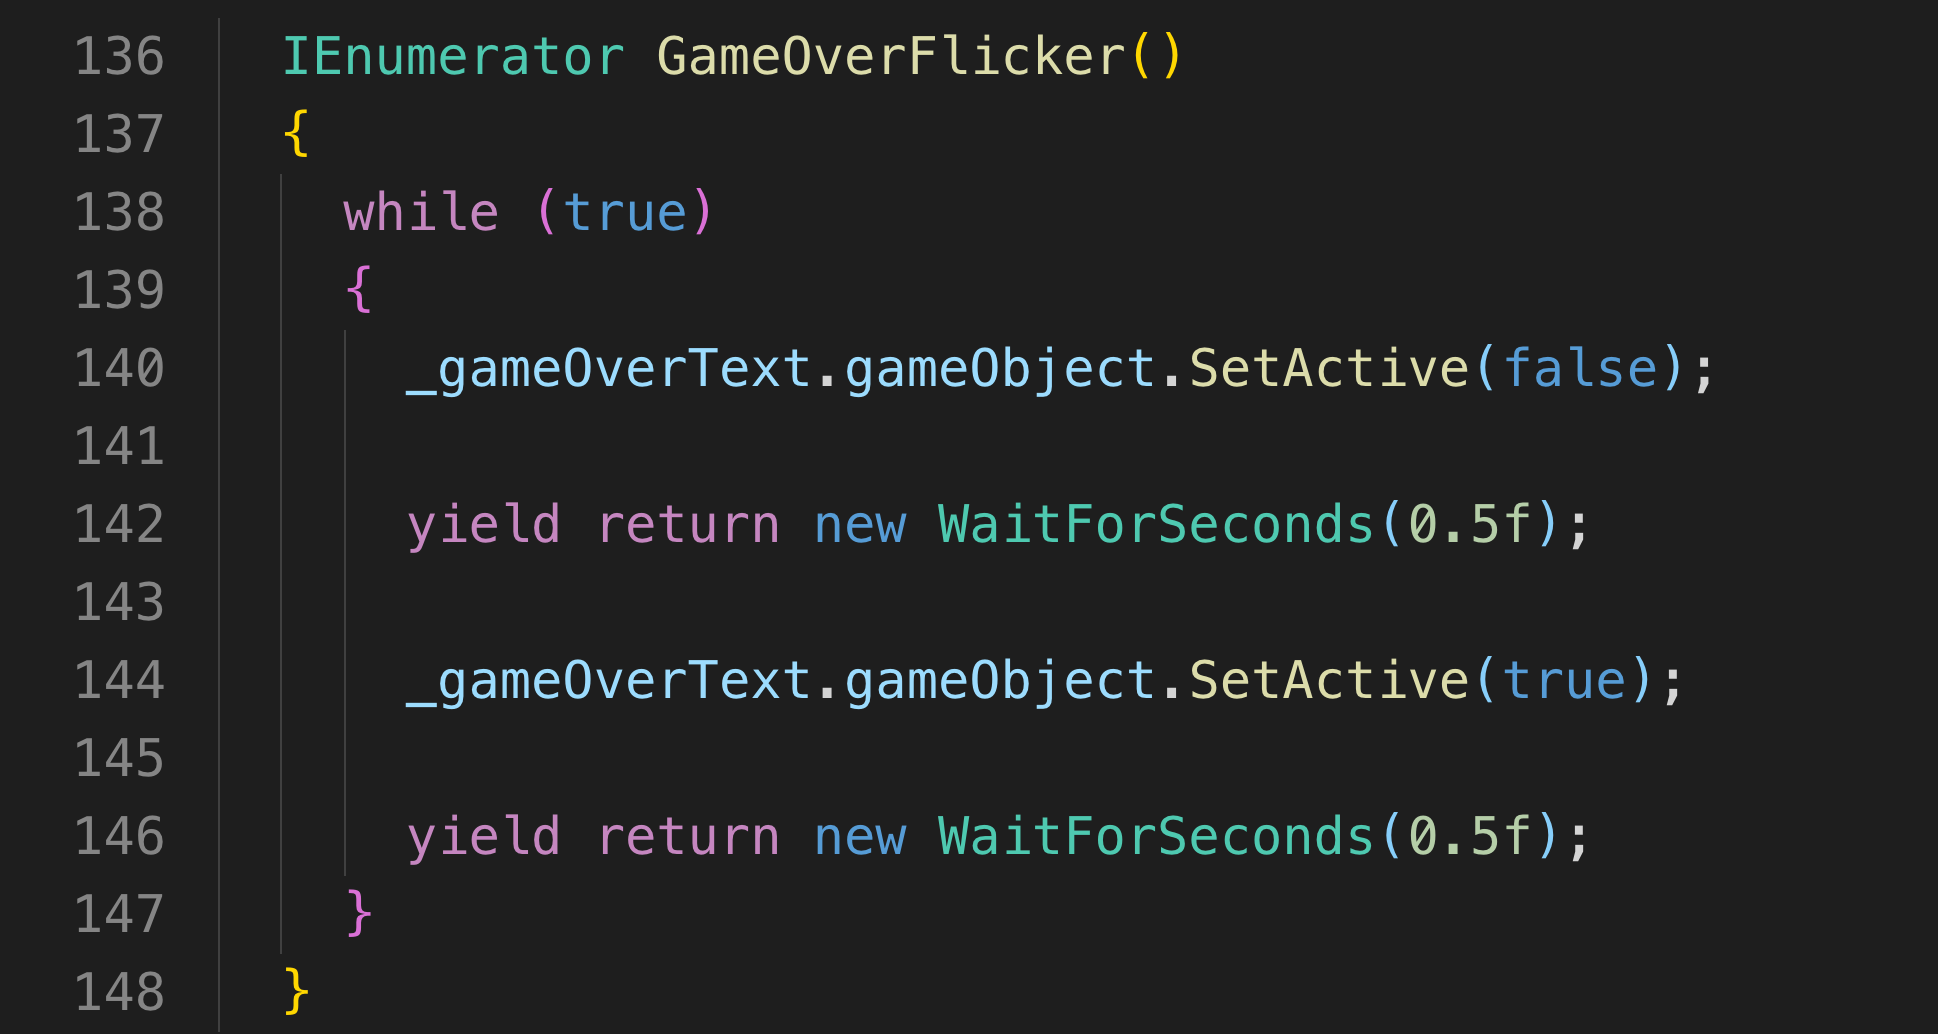
On line 124 I start the coroutine that flickers the Game Over
text on & off (a snippet of that is also below). I used an
"endless" while loop to achieve this but the coroutine will
end once we restart the game, since coroutines terminate when
the scene is reloaded.
Below is the GameOverFlicker() coroutine:
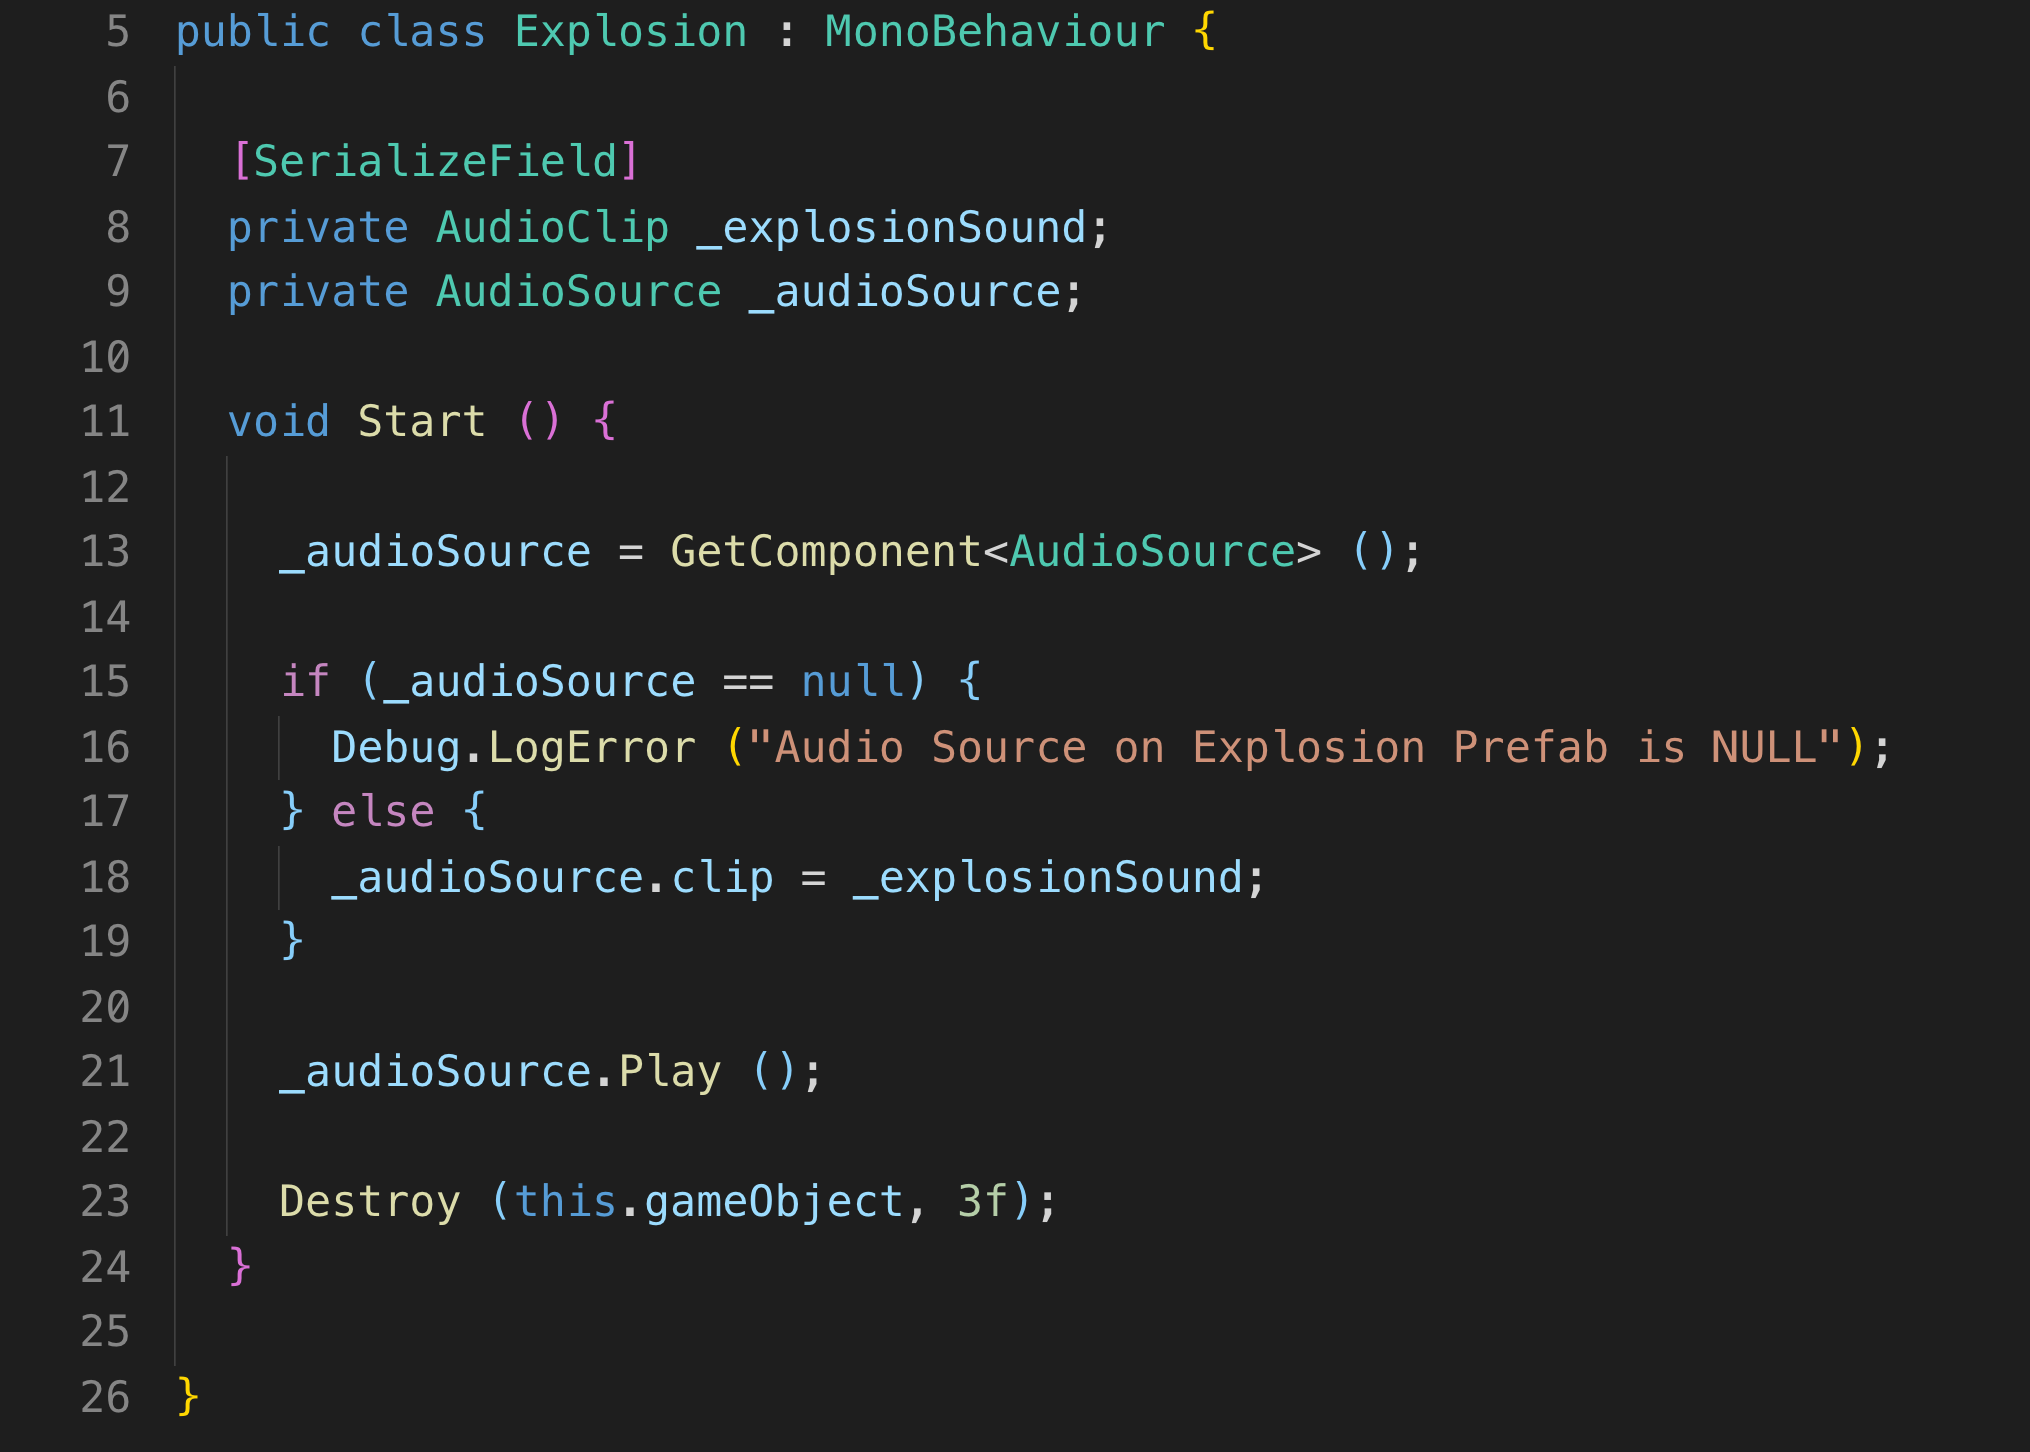
Explosion Animation & Sound Effect
Below is the code from the Explosion.cs script. This script is
attached to an object whose purpose is to play the explosion
animation, sound effect and destroy itself. In the video
above, after detecting collisions & destroying the asteroid,
this object will be instantiated,and explodes immediately.
The explosion object has an Audio Source component and an
audio clip assigned to that component. All we need to do to
see & hear the explosion is get that Audio Source on line 14
and then play the audio clip on that Audio Source on line 22.
I definitely like how Unity is composed of component that you
can easily find and access. It makes things more organized.
On line 23, I destroy the invisible & intangible explosion
object after 3 seconds. 3 seconds gives enough time for the
animation & sound effect to play.